
I believe I don’t even need to tell you why it is a good idea to use Facebook in our applications. 🙂 Apart from the fact that it is the most widely used social media service, we can use it to allow our users to share something from our app (increasing our app’s publicity and usefulness), get posts – pictures – videos about a specific topic for our users (like latest news about a music group), or we can just use it as a user account system (as I’ve mentioned in one of my previous blog posts here).  For this purpose, we will use Facebook’s Graph API which allows us to do basically anything we could do on Facebook from inside our apps, and combine it with the Facebook SDK for .NET. Since there is a huge number of different functionalities provided by Graph API, I will be only showing about a handful of them (most used ones), so it is a good idea to keep the documentation for Facebook Graph API and .NET Facebook SDK at your side.
  I’ve decided to split this article into several parts. In this first part, we will create a Windows Store app that signs the user in with a Facebook account, gets and displays our user’s information and finally allows our user to publish a status update. We’ll also see how we can get a long term access token from Facebook to keep our user signed in even after our app is closed.
Important Note: The long term access token from Facebook expires after 60 days. Normally, you need to check this in your application and make the user login again after the token expires (but we’re not going to do it in this article).
So, we start with creating our app on Facebook. Go to http://developers.facebook.com/ and sign in if you haven’t already.  Click “Apps” on the upper menu, select “Create New App”, and then enter a name and select a category for your app.
 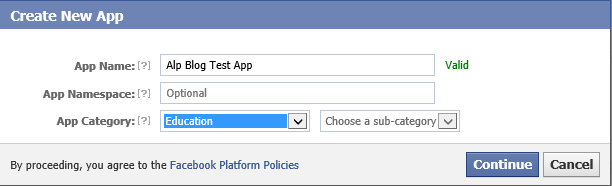 After clicking continue and passing a captcha security check, our app will be created and we’ll come across a page that shows the details of our app. We’ll be using the App ID and App Secret shown here in our app.
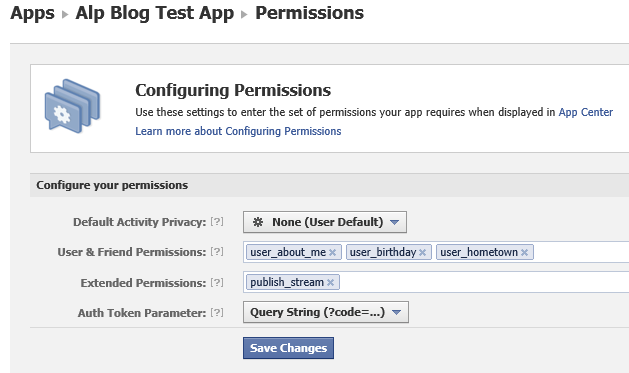
  Now, we need to set our app’s permissions. These permissions define which information we can access and which actions we can perform, and they are shown to the user before s/he approves our app. Our app will read basic user info (but for this example we’ll read user’s birthday and hometown information too), and we will also publish status updates; therefore we will need “user_about_me”, “user_birthday”, “user_hometown” and “publish_stream” permissions. If you want, here are lists of the permissions we can use and what they do: Profile properties and extended permissions.
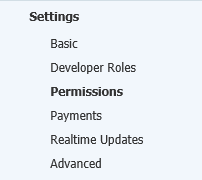
 Click “Save Changes” and we are set on Facebook’s end. Now we will create our Windows Store app, starting with creating a blank Windows Store App project in Visual Studio.
 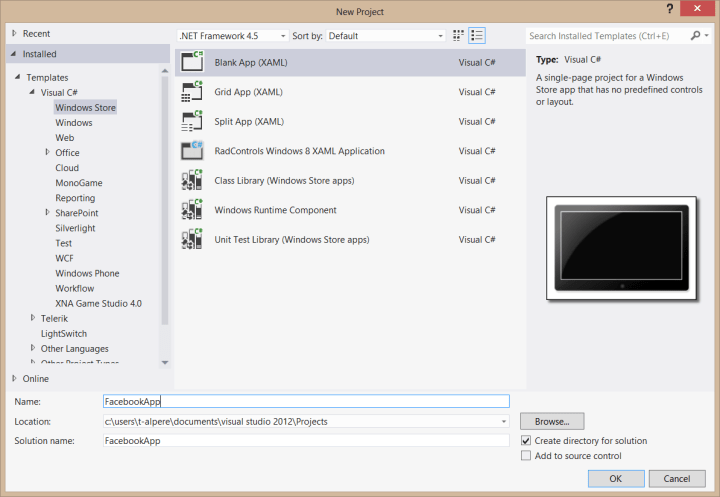 Then we will add the Facebook SDK for .NET via NuGet, by right clicking References in Solution Explorer and clicking Manage NuGet Packages, searching for Facebook and installing it.
 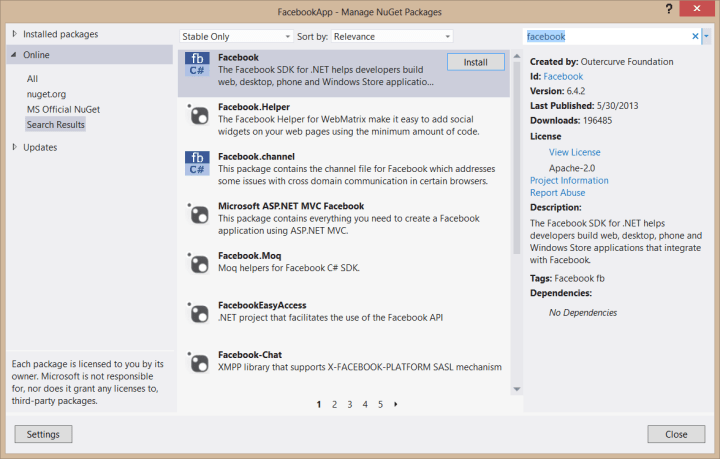 Now we will make our interface in MainPage.xaml, which will look like this:
    <Grid Background="{StaticResource ApplicationPageBackgroundThemeBrush}">
        <ProgressBar x:Name="ProgressBar" VerticalAlignment="Top" Visibility="Collapsed"/>
        <Button x:Name="ButtonSignIn" Content="Sign In" HorizontalAlignment="Left" Margin="100,100,0,0" VerticalAlignment="Top" Width="93" Click="ButtonSignIn_Click"/>
        <Image x:Name="ImageUser" HorizontalAlignment="Left" Height="150" Margin="100,143,0,0" VerticalAlignment="Top" Width="150"/>
        <TextBlock x:Name="TextBlockUserName" HorizontalAlignment="Left" Margin="100,298,0,0" TextWrapping="Wrap" VerticalAlignment="Top" FontSize="15"/>
        <TextBlock x:Name="TextBlockGender" HorizontalAlignment="Left" Margin="100,321,0,0" TextWrapping="Wrap" VerticalAlignment="Top" FontSize="15"/>
        <TextBlock x:Name="TextBlockBirthday" HorizontalAlignment="Left" Margin="100,344,0,0" TextWrapping="Wrap" VerticalAlignment="Top" FontSize="15"/>
        <TextBlock x:Name="TextBlockHometown" HorizontalAlignment="Left" Margin="100,367,0,0" TextWrapping="Wrap" VerticalAlignment="Top" FontSize="15"/>
        <TextBox x:Name="TextBoxPost" HorizontalAlignment="Left" Margin="507,143,0,0" TextWrapping="Wrap" VerticalAlignment="Top" Height="150" Width="400"/>
        <Button x:Name="ButtonPost" Content="Post Status" HorizontalAlignment="Left" Margin="507,298,0,0" VerticalAlignment="Top" Click="ButtonPost_Click"/>
    </Grid>
And finally, we will fill out MainPage.xaml.cs with the necessary code.
using Facebook;
using Windows.Storage;
using Windows.Security.Authentication.Web;
using Windows.UI.Popups;
using Windows.UI.Xaml.Media.Imaging;
    public sealed partial class MainPage : Page
    {
        FacebookClient facebookClient = new FacebookClient();

        string facebookAppId = "583249831740123"; //your app id here
        string facebookAppSecret = "9df80474169cf38322aee7e490db79b3"; //your app secret here
        string permissions = "user_about_me, user_birthday, user_hometown, publish_stream";
        string fbAccessToken;

        public MainPage()
        {
            this.InitializeComponent();
            this.Loaded += MainPage_Loaded;
        }

        void MainPage_Loaded(object sender, RoutedEventArgs e)
        {
            if (ApplicationData.Current.LocalSettings.Values["accesstoken"] != null)
            {
                ButtonSignIn.Content = "Sign Out";
                fbAccessToken = ApplicationData.Current.LocalSettings.Values["accesstoken"].ToString();
                ReadUserInfo();
            }
        }

        /// <summary>
        /// Invoked when this page is about to be displayed in a Frame.
        /// </summary>
        /// <param name="e">Event data that describes how this page was reached.  The Parameter
        /// property is typically used to configure the page.</param>
        protected override void OnNavigatedTo(NavigationEventArgs e)
        {
        }

        private void ButtonSignIn_Click(object sender, RoutedEventArgs e)
        {
            if (ButtonSignIn.Content.ToString() == "Sign In")
            {
                SignInToFacebook();
            }
            else
            {
                ButtonSignIn.Content = "Sign In";
                fbAccessToken = null;
                ApplicationData.Current.LocalSettings.Values.Remove("accesstoken");
            }
        }

        async private void SignInToFacebook()
        {
            ButtonSignIn.IsEnabled = false;
            try
            {
                string redirectUri = "https://www.facebook.com/connect/login_success.html";

                Uri loginUrl = facebookClient.GetLoginUrl(new
                {
                    client_id = facebookAppId,
                    client_secret = facebookAppSecret,
                    scope = permissions,
                    redirect_uri = redirectUri,
                    display = "popup",
                    state = "true",
                    response_type = "token"
                });

                WebAuthenticationResult webAuthenticationResult = await WebAuthenticationBroker.AuthenticateAsync(
                    WebAuthenticationOptions.None,
                    loginUrl,
                    new Uri(redirectUri));

                if (webAuthenticationResult.ResponseStatus == WebAuthenticationStatus.Success)
                {
                    ProgressBar.IsIndeterminate = true;
                    ProgressBar.Visibility = Visibility.Visible;
                    Uri callbackUri = new Uri(webAuthenticationResult.ResponseData.ToString());
                    FacebookOAuthResult facebookOauthResult = facebookClient.ParseOAuthCallbackUrl(callbackUri);
                    string accessToken = facebookOauthResult.AccessToken;
                    if (!String.IsNullOrEmpty(accessToken))
                    {
                        dynamic longaccesstoken = await facebookClient.GetTaskAsync("oauth/access_token?grant_type=fb_exchange_token&client_id=" +
                                                         facebookAppId + "&client_secret=" + facebookAppSecret +
                                                         "&fb_exchange_token=" + accessToken);
                        fbAccessToken = longaccesstoken.access_token;
                        ApplicationData.Current.LocalSettings.Values["accesstoken"] = fbAccessToken;
                        ButtonSignIn.Content = "Sign Out";
                        ReadUserInfo();
                        ButtonSignIn.IsEnabled = true;
                        ProgressBar.Visibility = Visibility.Collapsed;
                        ProgressBar.IsIndeterminate = false;
                    }
                }
                else
                {
                    ButtonSignIn.IsEnabled = true;
                    ProgressBar.Visibility = Visibility.Collapsed;
                    ProgressBar.IsIndeterminate = false;
                }
            }
            catch
            {
                ButtonSignIn.IsEnabled = true;
                ProgressBar.Visibility = Visibility.Collapsed;
                ProgressBar.IsIndeterminate = false;
                MessageDialog messageDialog = new MessageDialog("The internet has been deleted. There is no Facebook any more. Sorry.");
                messageDialog.ShowAsync();
            }
        }

        async private void ReadUserInfo()
        {
            try
            {
                ProgressBar.IsIndeterminate = true;
                ProgressBar.Visibility = Visibility.Visible;
                dynamic userInfo = await facebookClient.GetTaskAsync("me?access_token=" + fbAccessToken);
                ImageUser.Source = new BitmapImage(new Uri(String.Format("https://graph.facebook.com/{0}/picture?type=large", userInfo.id)));
                TextBlockUserName.Text = userInfo.name;
                TextBlockGender.Text = userInfo.gender;
                TextBlockBirthday.Text = userInfo.birthday;
                TextBlockHometown.Text = userInfo.hometown.name;
                ProgressBar.Visibility = Visibility.Collapsed;
                ProgressBar.IsIndeterminate = false;
            }
            catch
            {
                ButtonSignIn.IsEnabled = true;
                ProgressBar.Visibility = Visibility.Collapsed;
                ProgressBar.IsIndeterminate = false;
                MessageDialog messageDialog = new MessageDialog("The internet has been deleted. There is no Facebook any more. Sorry.");
                messageDialog.ShowAsync();
            }

        }

        async private void ButtonPost_Click(object sender, RoutedEventArgs e)
        {
            if (fbAccessToken != null)
            {
                try
                {
                    var postparameters = new
                    {
                        access_token = fbAccessToken,
                        message = TextBoxPost.Text
                    };
                    dynamic result = await facebookClient.PostTaskAsync("me/feed", postparameters);
                    MessageDialog messageDialog = new MessageDialog("Post successful, check your Facebook page. :)");
                    await messageDialog.ShowAsync();
                }
                catch
                {
                    MessageDialog messageDialog = new MessageDialog("The internet has been deleted. There is no Facebook any more. Sorry.");
                    messageDialog.ShowAsync();
                }
            }
            else
            {
                MessageDialog messageDialog = new MessageDialog("Please sign in to Facebook first.");
                await messageDialog.ShowAsync();
            }
        }
    }
Let’s inspect what we’ve done here. At first, we set our app id, app secret and permissions. In SignInToFacebook function, we create a login url first. The redirectUri here won’t be used in our app since we won’t redirect the user to a website after login, but we still have to give it a value. After showing the user the login screen via WebAuthenticationAuthenticateAsync, we get the access token which is needed for every action we make. By default, these access tokens expire after a few hours, so we replace it with a long term token which is valid for 60 days (You still need to add a mechanism that asks the user to login again after 60 days). Afterwards, if there are no problems, we save this token to the local settings of our app so we don’t have to login again. In MainPage_Loaded, we check if we have a saved access token. If we do, this means the user has already signed in before, so we don’t need to ask him/her to sign in again. In ReadUserInfo, we make a get request to the user’s information (me), which returns us a Json string containing the data. For simplicity I just used dynamic variables in this part. And in ButtonPost_Click, we make a post request to users feed containing the text in the textbox. Finally, to sign out, we just make the current Facebook access token null and remove the existing token from the local settings. That’s it. Let’s run the app now and try signing in. 

 As you can see we successfully signed in and reached our user’s information. You’ll see that we don’t ask the user for signing in again unless s/he explicitly signs out. Also keep in mind that you can reach even hidden information this way; for example, my birthday’s visibility was set to “Only Me”, but since I allowed the app to reach it we can see it here. Let’s try posting something then.
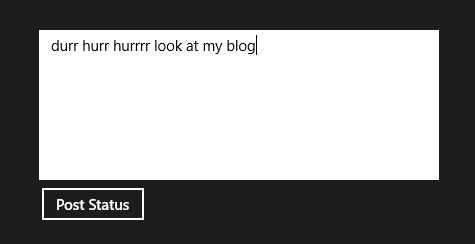
 Aaand it works. That’s it for the first part. In the next part of my article, we’ll see how we can read and display the user’s feed, how we can post something to a group, and how we can like/unlike and comment on posts. We’ll also see how we can create C# classes for Facebook items from a Json string. Here‘s the source code of our example. See you in part 2. 🙂

Hi, Nice article. Just need to say that token received by WebAuthenticationAuthenticateAsync itself last for 60 days. Which other long token you are
The long term token that I’m talking about is indeed the one you mentioned. It lasts for 60 days and we need to keep this in mind and make the user login again after it expires. Looks like I forgot to explain it in the article, I’ll edit it and add a little explanation. Thanks for mentioning this. 🙂
I can access all information but how to access email id ?