
When we are developing a Windows Store app, we may need to do something even if our application is suspended or closed; such as updating our live tile, showing a tile notification, syncing data or performing another specific action. Since Windows 8 is an operating system that emphasizes on power saving, we are not allowed to keep our application working in the background. Therefore, to have this functionality Windows 8 supports a background task system which allows us to define a background task (basically, our own lines of code) that will be executed periodically or when certain conditions are met. An example for this would be the Store application on the start screen, which periodically checks if there are updates to our installed apps, but does so when we have an internet connection.

Before moving on to developing our application, there are a few key points we need to know about background tasks. Background tasks have CPU and network constraints, we can not execute code that takes a long time to complete in our background tasks. The network constraint is active only when the device is on battery, and it is not calculated in terms of bandwidth but the amount of battery used by the connection. The limits of these constraints change depending on the type of the background task used.
If it is an application that needs to be frequently updated (such as a mail or VOIP app), the app will need to placed on the lockscreen but the background task will have a more relaxed resource management (2 seconds of CPU time). The catch is that the maximum number of apps that can be on the lockscreen at the same time is 7, so your user will need to add your app to the lockscreen in order your background task to work. If the application does not need to be updated that frequently, however, we can use a maintenance task, which doesn’t require the app to be on lockscreen and will be triggered based on certain conditions, but has a more restrict resource management (1 second of CPU time).

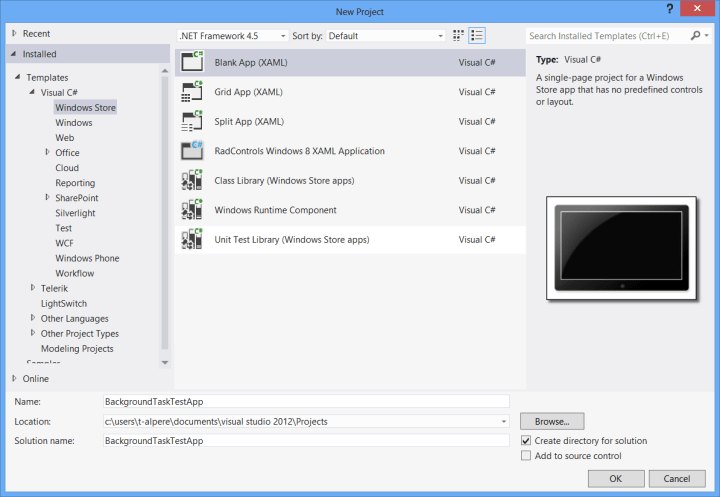
Let’s start developing. We will make an application that registers a background task, and that background task will enter the date and time to the local storage every time it runs. Then, we will retrieve these times in our application to see when our background task has run. We’ll begin by opening up Visual Studio and creating a blank Windows Store App project.
We will first prepare our interface. Let’s add a textbox to show the log, and two buttons, where one of them will register the background task and the other will refresh the log.
    <Grid Background="{StaticResource ApplicationPageBackgroundThemeBrush}">
        <TextBox x:Name="logTextBox" HorizontalAlignment="Left" Margin="100,120,0,0" TextWrapping="Wrap" VerticalAlignment="Top" IsReadOnly="True" AcceptsReturn="True" Width="300" Height="300"/>
        <Button x:Name="addBackgroundTaskButton" Content="Add Background Task" HorizontalAlignment="Left" Margin="100,425,0,0" VerticalAlignment="Top"/>
        <Button x:Name="refreshLogButton" Content="Refresh Log" HorizontalAlignment="Left" Margin="100,468,0,0" VerticalAlignment="Top"/>
    </Grid>

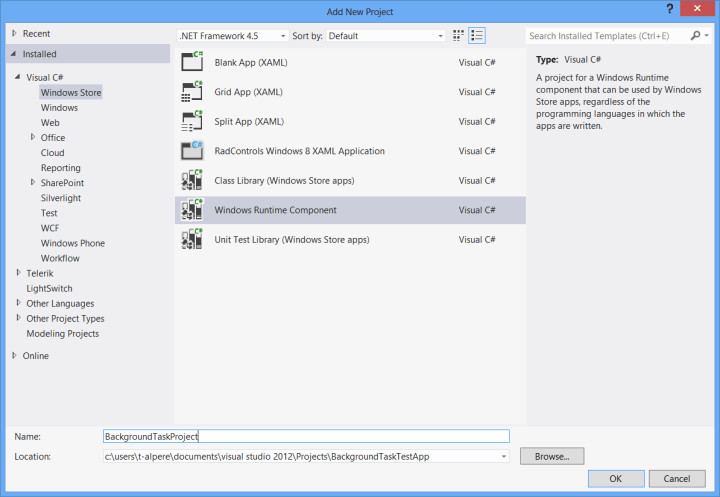
Next, we will need to add a new project to our solution for the background task. Right click the solution, select “Add”, select “New Project”, and add a new Windows Runtime Component (other project types will not work).

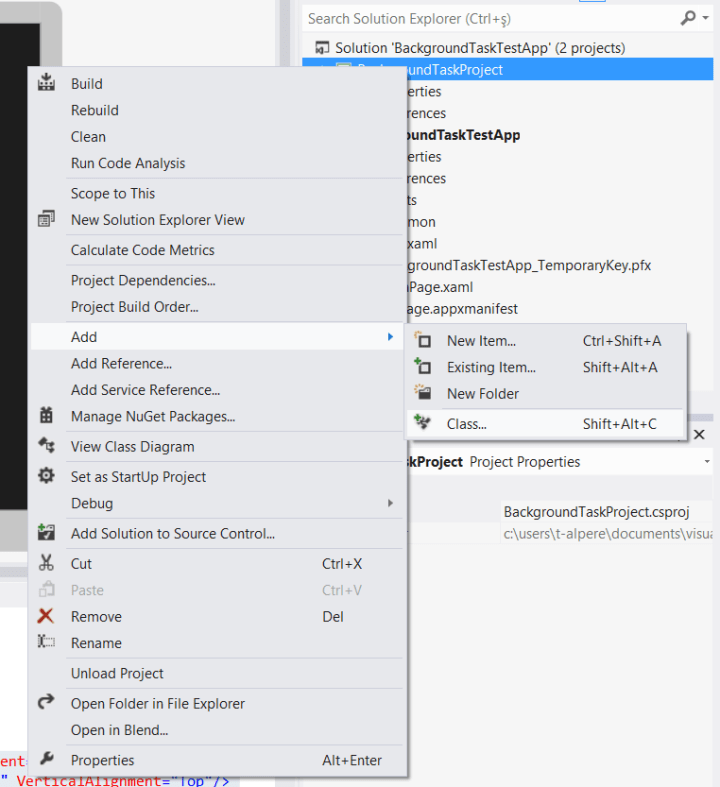
Right-click and delete the automatically generated Class1.cs file, then right-click to the BackgroundTaskProject and select “Add” -> “New Class”, and then name it BackgroundTask.

Add the following code to the BackgroundTask.cs file:
using System;
using System.Collections.Generic;
using System.Linq;
using System.Text;
using System.Threading.Tasks;
using Windows.ApplicationModel.Background;
using Windows.Storage;

namespace BackgroundTaskProject
{
    public sealed class BackgroundTask : IBackgroundTask
    {
        public void Run(IBackgroundTaskInstance taskInstance)
        {
            BackgroundTaskDeferral deferral = taskInstance.GetDeferral();
            addDateTime();
            deferral.Complete();
        }

        private void addDateTime()
        {
            ApplicationData applicationData = ApplicationData.Current;
            ApplicationDataContainer localSettings = applicationData.LocalSettings;

            if (localSettings.Values["datetime"] == null)
            {
                localSettings.Values["datetime"] = DateTime.Now.ToString();
            }
            else
            {
                string tempString = localSettings.Values["datetime"].ToString();
                tempString = tempString + "\n" + DateTime.Now.ToString();
                localSettings.Values["datetime"] = tempString;
            }
        }
    }
}
Important Edit: If you are going to do some asynchronous work in your background task, such as connecting to a web service, you need to make your function in the background task return a Task and use the await keyword, or else your background task will work synchronously and can not do any async operations:
namespace BackgroundTaskProject
{
    public sealed class BackgroundTask : IBackgroundTask
    {
        public void Run(IBackgroundTaskInstance taskInstance)
        {
            BackgroundTaskDeferral deferral = taskInstance.GetDeferral();
            await addDateTime();
            deferral.Complete();
        }

        async private Task addDateTime()
        {
            //Do async work
        }
    }
}
This code defines what we will run in our background task. Now we will need to prepare our application side. On the MainPage.xaml.cs, add the following code to the Click events of addBackgroundTaskButton and refreshLogButton:
        private void addBackgroundTaskButton_Click(object sender, RoutedEventArgs e)
        {
            BackgroundTaskBuilder builder = new BackgroundTaskBuilder();
            builder.Name = "Date Time Background Task";
            builder.TaskEntryPoint = "BackgroundTaskProject.BackgroundTask";
            IBackgroundTrigger trigger = new TimeTrigger(15, false);
            builder.SetTrigger(trigger);
            IBackgroundTaskRegistration task = builder.Register();
        }

        private void refreshLogButton_Click(object sender, RoutedEventArgs e)
        {
            ApplicationData applicationData = ApplicationData.Current;
            ApplicationDataContainer localSettings = applicationData.LocalSettings;

            if (localSettings.Values["datetime"] != null)
            {
                logTextBox.Text = localSettings.Values["datetime"].ToString();
            }
        }
In this code, you can see that we’ve added a background task that will run every 15 minutes. Make sure that you enter the “builder.TaskEntryPoint” correctly, this should point to our class which implements the IBackgroundTask interface. Since we are defining it as a string, this is a common place to make a mistake.
Important Edit: We used TimeTrigger in this code example, which requires the application to be added to lockscreen. Instead, you can use MaintenanceTrigger which does not require your application to be on the lockscreen. Also keep in mind that if you use TimeTrigger, you should also add some code that prompts the user to add it to the lockscreen (which is not shown in this post).
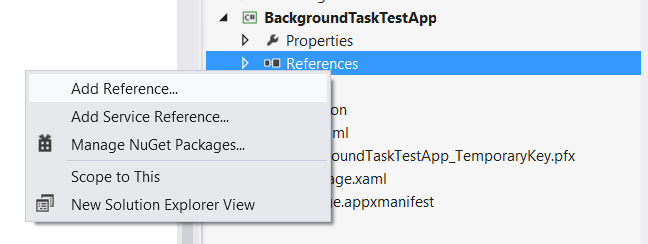
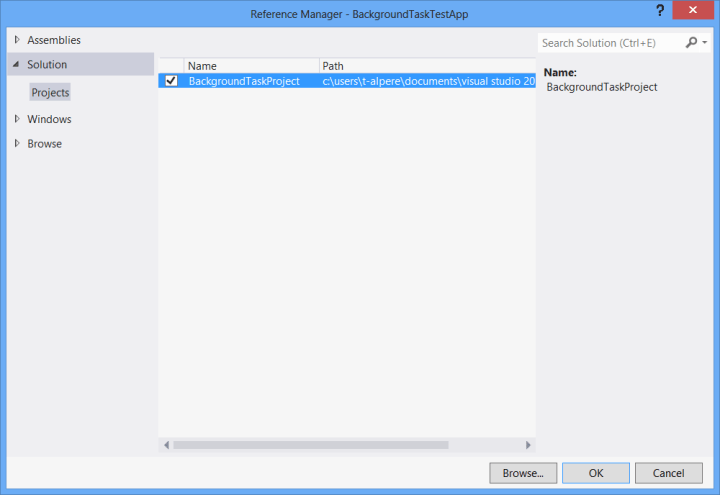
Our next step will be adding the reference of our background task project to our windows store app project. Right click references, select “Add New Reference”, and in the Solution section, select BackgroundTaskProject and click Ok.
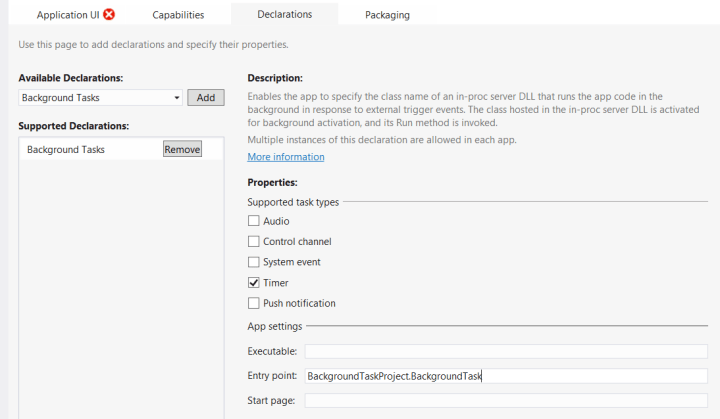
The last thing we will need to do is to open our package.appxmanifest file, select the Declarations tab, and add Background Tasks.

As you notice, there are some red X marks indicating that we are missing something. Check the “Timer” checkbox and enter “BackgroundTaskProject.BackgroundTask” to the entry point textbox.
Important Edit: If you are using a MaintenanceTrigger instead of TimeTrigger, select “System Event” instead of “Timer”.
After filling these, you can see that there is still a red X in the Application UI tab. This is because a timer background task requires to be on the lockscreen to run, and our app needs to have a badge logo that will be shown on lockscreen. Select the Application UI tab, select “Badge” in Lock Screen Notifications combo box, and add a 24×24 badge logo (I’ve added a blank .png file).

We are ready to start running our application, but before starting it, add a break point to our function in the background task so we can see if it is working as we wanted.
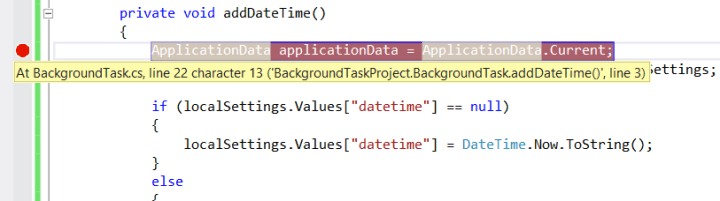
Run the application, and click the “Add background task” button once. Then, to run our background task without actually waiting for 15 minutes, switch back to Visual Studio, click the little arrow near the Suspend button, and select the background task. When you click it, you will see that we will hit our previously defined break point. If you don’t have the suspend button, you can show it by selecting View -> Toolbars -> Debug Location.

If you click refresh after this, you can see that our background task has worked.

If you wish to check if it really works, add the app to lockscreen from the PC Settings, then open it and add background task again, close the app, and after some time open it again and refresh the log. 🙂
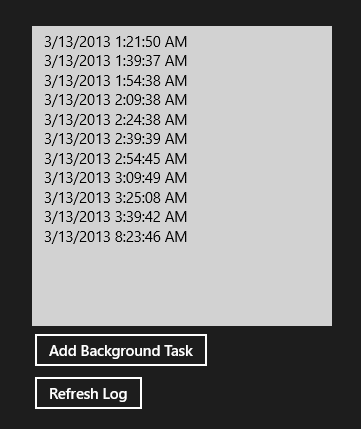
(My pc was turned off so that’s why the time jumped from 03:39 to 8:23 :))
You can get the source code here.

Great bloog post