Tip: Passing Multiple Parameters to a New Page in Windows Store Apps – Boredom Challenge Day 8

Standard

Today’s post will be a small tip about how we can pass multiple parameters when navigating to another page in a Windows Store app.

Frame.Navigate() method, which is used for navigating to another page, allows us to send a parameter to the new page like this:

string parameter = "The information that you wish to send to the next page.";
Frame.Navigate(typeof(AnotherPage), parameter);

Then we get the parameter in OnNavigatedTo() function of AnotherPage, like this:

        protected override void OnNavigatedTo(NavigationEventArgs e)
        {
            string passedParameter = e.Parameter.ToString();
        }

So basically we can send any object we want this way. But what if we want to send more than one parameter (which is quite common)? We can not just do it like this:

string parameter = "The information that you wish to send to the next page.";
int parameter2 = 5;
Frame.Navigate(typeof(AnotherPage), argument, argument2);

In this case, we can use application level global variables (but that isn’t good practice, really), or we can use the following way of navigation instead of Frame.Navigate():

string parameter = "The information that you wish to send to the next page.";
int parameter2 = 5;
Window.Current.Content = new AnotherPage(parameter, parameter2);
        public AnotherPage(string firstArgument, int secondArgument)
        {
            this.InitializeComponent();
        }

If we use Window.Current.Content to change the page, we forgo the navigation support, and if you have more than a few pages in our app, going back and forth becomes very impractical and ineffective since you have to do everything manually.

Therefore, we can create a custom class called AnotherPagePayload instead, set our parameters in it, and send that object:

        public class AnotherPagePayload
        {
            public string parameter1 { get; set; }
            public int parameter2 { get; set; }
        }
AnotherPagePayload payload = new AnotherPagePayload();
payload.parameter1 = "Information you want to send to the next page.";
payload.parameter2 = 5;
Frame.Navigate(typeof(AnotherPage), payload);

And then retrieve it like this, in AnotherPage:

        protected override void OnNavigatedTo(NavigationEventArgs e)
        {
            AnotherPagePayload passedParameter = e.Parameter as AnotherPagePayload;
            string parameter1 = passedParameter.parameter1;
            int parameter2 = passedParameter.parameter2;
        }

That’s it. It’s a small detail, but if you don’t know how to do it when you start developing your app, correcting it later takes some time.

Thank you for reading.

Windows Store Uygulamalarında XML Serialization

Standard

Serialization, en genel haliyle bir veri yapısını ya da nesneyi saklanabilecek ya da taşınabilecek bir biçime dönüştürme işlemidir. Bu işlemin amacı genelde bir veri yapısını dosya içinde saklamak ya da ağ üzerinden bir başka konuma aktarabilmektir, ki bu sayede ardından deserialization işlemi uygulanarak nesneye istenilen zamanda ya da konumda ulaşılabilir.

Buna örnek olarak bir haber uygulamasını verebiliriz: Haberleri ilk açılışında internetten çekip, ardından serialization işlemi uygulayarak bir dosyaya kaydedebilir, sonrasında ise güncellemesi için belirli bir süre geçmediği takdirde her açılışta haberleri sıfırdan indirmek yerine dosyadan çok daha hızlı bir şekilde okuyarak kullanıcıya gösterebilir (ya da, haberlerin indirilmesi uzun sürüyorsa, bu süre içerisinde ekranın boş olmaması için en son indirdiği haberleri gösterebilir). Başka bir örnek de, bir kullanıcının Facebook’taki hareketlerini Facebook’a bağlanarak almak istediğimizde bize bunu serialization uygulanmış halde vermesini ve bizim kendi uygulamamızda bunu deserialization ile uygun bir sınıfa dönüştürmemizi verebiliriz.

Bu yazımda, bir Windows Store uygulamasında kendi sınıfımızın bir listesini XML Serialization kullanarak dosyaya kaydedip, ardından okuyan örnek bir uygulama oluşturacağız.

Bunun için Visual Studio 2012’yi açıp, yeni bir Windows Store Blank App projesi açalım.

1

➤ Devamını okuyun…

Using and Debugging Background Tasks in Windows Store Apps

Standard

When we are developing a Windows Store app, we may need to do something even if our application is suspended or closed; such as updating our live tile, showing a tile notification, syncing data or performing another specific action. Since Windows 8 is an operating system that emphasizes on power saving, we are not allowed to keep our application working in the background. Therefore, to have this functionality Windows 8 supports a background task system which allows us to define a background task (basically, our own lines of code) that will be executed periodically or when certain conditions are met. An example for this would be the Store application on the start screen, which periodically checks if there are updates to our installed apps, but does so when we have an internet connection.

1

Before moving on to developing our application, there are a few key points we need to know about background tasks. Background tasks have CPU and network constraints, we can not execute code that takes a long time to complete in our background tasks. The network constraint is active only when the device is on battery, and it is not calculated in terms of bandwidth but the amount of battery used by the connection. The limits of these constraints change depending on the type of the background task used.

If it is an application that needs to be frequently updated (such as a mail or VOIP app), the app will need to placed on the lockscreen but the background task will have a more relaxed resource management (2 seconds of CPU time). The catch is that the maximum number of apps that can be on the lockscreen at the same time is 7, so your user will need to add your app to the lockscreen in order your background task to work. If the application does not need to be updated that frequently, however, we can use a maintenance task, which doesn’t require the app to be on lockscreen and will be triggered based on certain conditions, but has a more restrict resource management (1 second of CPU time).

2

➤ Let’s see how background tasks work…

Using Microsoft Translator in Windows Store Apps

Standard

Microsoft Translator is a translation portal by Microsoft as part of Bing services that can provide a machine-translation of texts or entire web pages in (currently) 40 different languages. Microsoft Translator also provides a set of web service APIs (that can be called via an HTTP REST service, an AJAX callable service, or a SOAP service) for developers who wish to use Microsoft Translator in their applications. In this article we will develop a Windows Store application that uses the SOAP service of Microsoft Translator to translate text between languages, and if supported, speak the translated text.

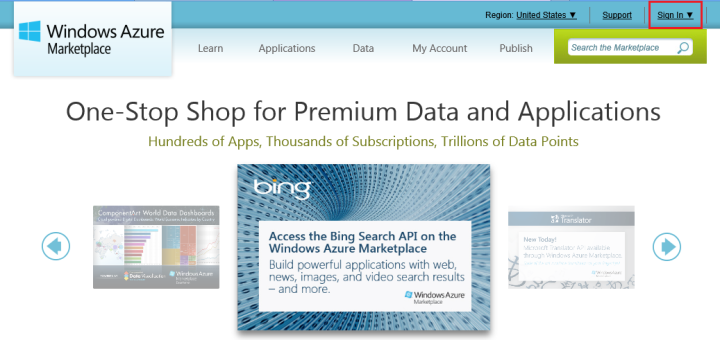
Microsoft Translator is available on Windows Azure Marketplace and is licensed monthly based on the number of characters sent to the translation service. However, it is free up to 2.000.000 characters each month, so we can just sign up and start using it for free.

We will start by going to Windows Azure Marketplace and signing in with our Live ID. If you don’t have a Windows Azure Marketplace account associated with the Live ID you used to sign in, you will simply create one by entering your name, surname, country (and optionally your organization).

1

2

After your registration is complete, either search for “Microsoft Translator” on Windows Azure Marketplace or click here to go to Microsoft Translator page, and click Sign Up at the bottom offer (2.000.000 characters).

3

➤ Let’s see how we can use Microsoft Translator…

Using IValueConverter in Windows Store Apps

Standard

When using data binding, we may sometimes want to alter the data before presenting it to user, or we may want to change the appearance of something based on the value of the data. For example, assuming we are binding a date value, we may want to change its formatting, or we may want to change the background color based on whether the date is before or after the current date, or even show something special on certain dates (such as flowers on February 14th).

When we bind a list of items to a control (such as GridView or ListView), we can not edit individual templates of the items. We may also be getting our data from another source, such as a webservice, so we may not have control over the data we receive. So, in order to implement the features I’ve explained on the previous paragraph, we will need to use IValueConverter interface, which provides exactly what we need. In this article, we will be developing a Windows Store application that uses the IValueConverter interface.

We’ll start by opening Visual Studio and creating a new Windows Store Blank App project. I’m naming the project IValueConverterApp.

1

For this example, we will have a list of students. Our students will have a grade between 0 and 100. Our application will display these students, but their grades will need to be in letters (between FF and AA), the item color will be different based on the grade (100 – 80 will be green, 79 – 60 will be orange, and 59 – 0 will be red), and if the grade is 100 we will put a star next to the student’s name.

➤ Let’s see how we can use IValueConverter…

LINQ to SQL ile İleri Arama – PredicateBuilder

Standard

İleri arama (daha bilindik adı ile advanced search) kullanıcıların büyük miktarlardaki veriyi istedikleri şekilde filtrelemesini sağlar. Tipik bir ileri arama ekranı pek çok metin kutusu ve/veya liste bulundurur ve kullanıcılar bunların arasından istediklerini doldurup istediklerini boş bırakarak arama yaparlar. Bu yazımda birlikte bir veritabanından LINQ to SQL ile bu şekilde ileri arama yapabilen bir Silverlight uygulaması oluşturacağız.

Arkaplanında bir veritabanı olan uygulamamızda böyle bir ekran oluşturmak istediğimizde, ilk bakışta LINQ to SQL kullanarak “Select From Where” ile istediğimiz sonuca ulaşmamız gayet kolaymış gibi gelebilir. Ancak şimdi üzerinden gideceğimiz örneğe baktığımızda, bazı alanların boş bazılarının dolu olmasının işleri nasıl karıştırdığını ve sorgumuzun “Where” ifadesini dinamik olarak oluşturmamız gerektiğini göreceksiniz.

➤ Devamını okuyun…