
When you are using external data sources in your app, such as a database on a remote server, one of the most common issues you encounter during development is that you may not have access to the data you’re going to use in the app. The database may not be created or populated yet, you might not have access to the database at this point or you may just want to prepare a mock-up for prototyping or presentation purposes and don’t want to spend time and effort for a database. This situation causes some minor inconveniences for developers and (especially) designers in two areas: When you are designing the app, and when you are running it.
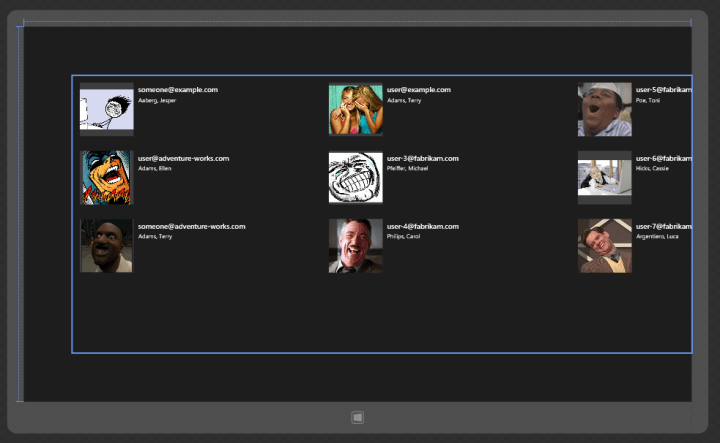
During design time, you see the values of binded objects empty. So if you bind the text of a TextBlock object, it will be blank. To cope with this, designers would usually create the design with some placeholder values and apply the bindings after that. However, this has the following three downsides: You still can’t see how the app will look in design time; you can see what parts of the design needs to be fixed only when the app is running; and to fix the design you have to break the bindings, give placeholder values again, modify the design and then apply the bindings again, which gets annoying quite fast and makes designing process harder. For example, look at the following image from the example WinRT app we’ll create in this article:

The user information (including the picture) is binded to a data source. This is how it looks in runtime, in a GridView.

And this is how that GridView’s item template looks like in design time. The GridView itself doesn’t even show anything in the XAML designer.
During runtime, you need to create the sample data and set your object’s ItemsSource in the codebehind file. This has the following issues: If you are purely a designer, this requires you to mess with the code so it may be an issue for both you and your project team; you need to enter sample values yourself; and you need to remove the code you’ve added when you are able to connect to the live database.
Fortunately, to overcome these issues, Blend provides us a handy feature called Sample Data which allows us to create a sample data source that generates values based on our specifications and then bind our objects to that sample data source. Considering the benefit of using sample data without writing a single line of code and being able to see the sample values both within runtime and design time, this feature helps us solve the aforementioned problems and simplifies the designing process. And of course, in this article, we’ll create a Windows Store app in Blend that uses a sample data source.
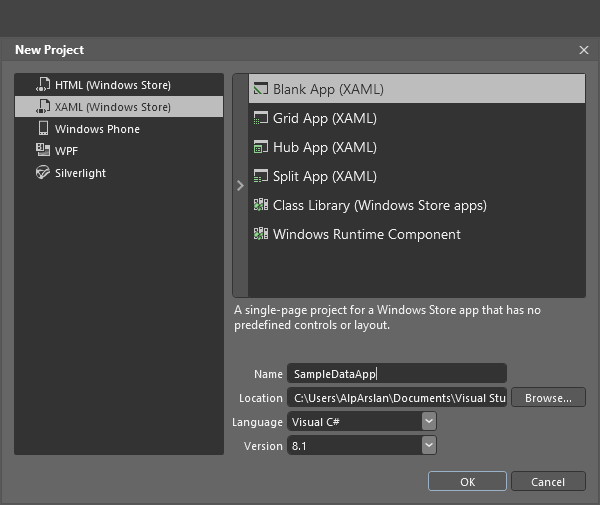
Ok then, let’s start Blend and create a new blank Windows Store app project.
We’ll start by creating the sample data source first, so that we could better see how the sample data is applied and shown in the designer. To do this, go to the Data tab on the upper right of the screen, click “Create sample data” and select “New Sample Data”. You’ll see here that we can also create a sample data source from an existing class, which is useful if you already have a class defined.


After clicking OK and creating the sample data source, delete the default Groups object so the data source becomes empty.

Before moving on, let’s see what we can add to our sample data source. If you click the little down arrow near the plus sign of the sample data source, you’ll see that there are 3 property types we can add: Simple property, Complex property and Collection property.
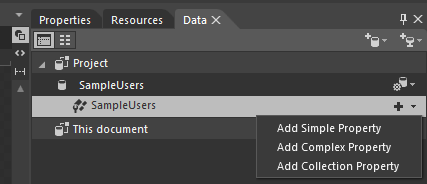
Simple property is just one value, which can be a string, number, boolean or image. Complex properties are objects that can contain other properties, and Collection properties are the equivalent of a List object because they contain multiple instances of the properties within them.
In our example, we’ll need to display the name, age, e-mail, website and profile picture of a user. In order to display this in the application, we’ll first create a UserList (collection property) which will contain our users (like a table in a database) and then define 5 simple properties for the data we want to display. Let’s just go ahead and add them (we’ll specify what they should contain after this step).

Now, we have a UserList that will contain several users, and each user will have 5 properties we’ve defined. Next, we need to set what each of these properties will contain. Click the button that displays “abc” on the right of the Age property.
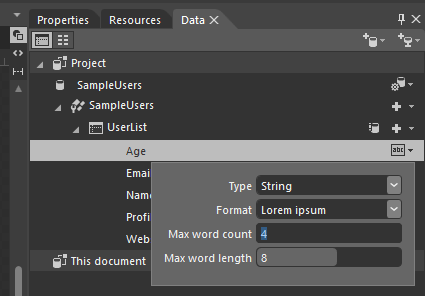
We can select the type of the property, and we’ll have extra settings depending on that type. Since Age is a number, click the type and change it to a number.

Now, the Age value will be a number with two digits. Easy, right? 🙂 Next, select the Email property. This will be a string, but we can change its format to “Email Address” so that the data source generates sample e-mail addresses.

As you can see, we can specify many common string values here. Next, for the Name and Website properties, select their Formats as Name and Website URL respectively.


Finally, to define a set of pictures for the ProfilePic property, select its type as Image and then specify a folder from which the pictures will be used. For this example, I created a folder that contained several pictures of people laughing. When you specify the folder, the pictures will be added to your project under SampleData -> SampleUsers -> SampleUsers_Files folder.


Our sample data source is now ready to be used. Now we just need to create a GridView and bind the data source to display the users. To do this, add a GridView to the artboard and just drag and drop the UserList from the Data tab. This will automatically bind the UserList property to the ItemsSource of the GridView, which will look like the following:
An item template is automatically created and added to the GridView to display the current sample data. The last thing we need to do is to define our own ItemTemplate for the GridView and do the individual bindings. To do this, right click the GridView, select Edit Additional Templates -> Edit Generated Items -> Create Empty.


Then we’ll create an item template for the GridView. I’ve created a template (without bindings) with the following code:
    			<DataTemplate x:Key="UsersGridViewDataTemplate">
    				<Grid Width="417" Height="167" Background="#FF4F3333" RenderTransformOrigin="0.5,0.5" DataContext="{Binding}">
    					<TextBlock Margin="20,20,150,0" VerticalAlignment="Top" FontSize="18.667" FontFamily="Segoe UI" FontWeight="SemiLight"  TextTrimming="CharacterEllipsis"/>
    					<TextBlock Margin="20,52,150,0" VerticalAlignment="Top" FontSize="18.667" FontFamily="Segoe UI" FontWeight="SemiLight" TextTrimming="CharacterEllipsis"/>
    					<TextBlock Margin="20,84,150,0" VerticalAlignment="Top" FontSize="18.667" FontFamily="Segoe UI" FontWeight="SemiLight" TextTrimming="CharacterEllipsis"/>
    					<TextBlock Margin="20,116,150,0" VerticalAlignment="Top" FontSize="18.667" FontFamily="Segoe UI" FontWeight="SemiLight" TextTrimming="CharacterEllipsis"/>
    					<Image HorizontalAlignment="Left" Height="123" Margin="272,20,0,0" VerticalAlignment="Top" Width="123" Stretch="UniformToFill"/>
    				</Grid>
    			</DataTemplate>
To do the bindings, select the object you want to bind; for example, the TextBlock which will display the name; then on the property you want to bind (Text property of the TextBlock), click square button next to the property and select Create Data Binding. In the window that opens, select “Data context” as the binding type and “Name” as the path.
Note: Don’t select “Data source” as the binding type here. If you do, all of your items in the GridView will get the data from the first item in the data source. That is why we get it from the data context.

The moment you press OK, you’ll see that the GridView will be filled with generated names. 🙂 Do the same procedure for remaining properties; bind the Text property for TextBlocks and Source property for the Image. When you are done, it will look like this:

That’s it. 🙂 Now we can see how the data will look like, both in design time and in runtime, and modify it as we wish. 🙂
One small note I want to add is that if you wish to modify the generated values, you can use the “Edit sample values” button on the right of the UserList collection. This will open a window where you can modify the values as well as specify the number of items in the collection.


Another small note I want to add is that you can use sample data sources as design time data context only. This way, you can use the live database during runtime but keep using the sample data source in design time. 🙂 This can be set in the lower right part of the screen when the Data tab is selected.
You can get the source code of our example app from this link.
Thank you for reading. 🙂

The sample link can’t work ,can you fix it? thanks