
Azure blob (binary large object) storage allows us to store files on the cloud and it can be used in many scenarios, such as storing user related files (e.g. profile pictures), keeping backup or storing audio and video files for our application. In this article, we’ll see how we can develop a Windows Phone application that takes (or selects) a picture and uploads it to Windows Azure.
Note: I was showing the latest uploaded image here, but unfortunately I had to cancel my Azure subscription. Therefore, the storage key in this example (and in the source code) will not work. Don’t forget to use your own storage account credential and key.
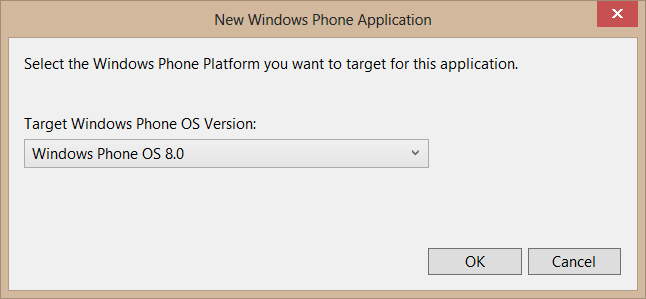
Then, let’s begin by opening up Visual Studio and creating a new Windows Phone project.

Now, on MainPage.xaml, we’ll add two buttons – one to take a picture, one to select a picture.
        <StackPanel x:Name="TitlePanel" Grid.Row="0" Margin="12,17,0,28">
            <TextBlock Text="WP Blob Upload App" Style="{StaticResource PhoneTextNormalStyle}" Margin="12,0"/>
            <TextBlock Text="upload image" Margin="9,-7,0,0" Style="{StaticResource PhoneTextTitle1Style}"/>
        </StackPanel>

        <!--ContentPanel - place additional content here-->
        <Grid x:Name="ContentPanel" Grid.Row="1" Margin="12,0,12,0">
            <StackPanel>
            <Button x:Name="selectImageButton" Content="Select Photo" VerticalAlignment="Top" Margin="0,10,0,0"/>
            <Button x:Name="takePhotoButton" Content="Take Photo" VerticalAlignment="Top" Margin="0,10,0,0"/>
            </StackPanel>
        </Grid>
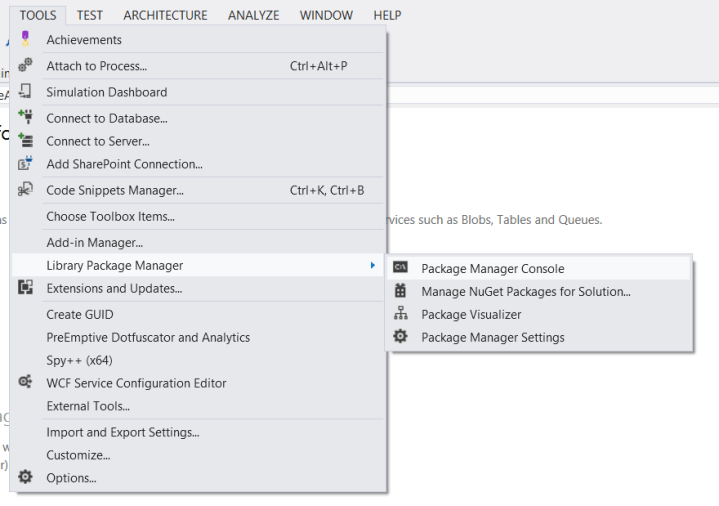
Next, we need to add the “Phone.Storage” library in order to connect to Azure blob storage. To do this in Visual Studio, go to Tools, highlight Library Package Manager and select Package Manager Console. After the console is opened at the bottom of the screen, type “Install-Package Phone.Storage -Version 1.0.1” (without the quotation marks) to download and add the library.

Next, we need to make a small addition in App.xaml to make the library work with WP8. In App.xaml, you’ll see a line of code like this:
<ResourceDictionary><ResourceDictionary.MergedDictionaries></ResourceDictionary.MergedDictionaries><silverlightactivator:ActivationManager x:Name="SilverlightActivator" LoadAssemblyParts="False" /></ResourceDictionary></Application.Resources>
Change it with the following:
<ResourceDictionary x:Key="SomeKey"><silverlightactivator:ActivationManager x:Name="SilverlightActivator" LoadAssemblyParts="False" /></ResourceDictionary></Application.Resources>
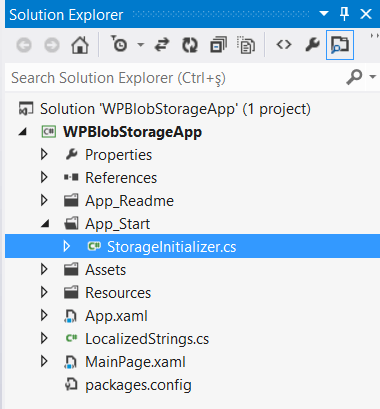
Next, we will need to add our Azure storage account key. To do this, open “StorageInitializer.cs” under “App_Start” folder, uncomment the necessary code part (as shown below) and enter your storage account credentials.


Final code in StorageInitializer.cs will be like this:
        public static void ApplicationStartup()
        {
            // By using CloudStorageClientResolverAccountAndKey.DevelopmentStorageAccountResolver you can connect directly
            // against the Windows Azure Storage Emulator.
            //var resolver = CloudStorageClientResolverAccountAndKey.DevelopmentStorageAccountResolver;

            // By using CloudStorageClientResolverProxies you can connect to a Windows Azure Web Role that contains the
            // Windows Azure Storage Proxies.
            // Create a new Cloud project with an MVC 3 Web Role and install the WindowsAzure.Storage NuGet package.
            // var resolver = new CloudStorageClientResolverProxies(
            //    new StorageCredentialsAnonymous() /* By default, the proxy services are anonymous */,
            //    new Uri("http://localhost:81/sas"),
            //    new Uri("http://localhost:81/queues"),
            //    new Uri("http://localhost:81/tables"),
            //    Deployment.Current.Dispatcher);

            // By using CloudStorageClientResolverAccountAndKey you can connect to your Windows Azure Storage Services account directly.
            // Just replace your Windows Azure Storage account credentials and endpoints.
            var resolver = new CloudStorageClientResolverAccountAndKey(
               new StorageCredentialsAccountAndKey("alppresentationstorage", "K+iJy/sxYw8jwH9wF3xSzF/qB/7bSi1ZB7+E8RFn0PJPWnfhYJPF3G9FfYYEjrMjooVh0Xqcw5ztrzlziXFhfw=="),
               new Uri("http://alppresentationstorage.blob.core.windows.net"),
               new Uri("http://alppresentationstorage.queue.core.windows.net"),
               new Uri("http://alppresentationstorage.table.core.windows.net"),
               Deployment.Current.Dispatcher);

            CloudStorageContext.Current.Resolver = resolver;
        }
As you can see, I’ve provided a storage account (with its key) for this example. You can either use it for testing, or put your own storage account credentials. I’ll be keeping my eye on this storage account so I’ll remove the key in case someone who reads this post gets any funny ideas. 🙂
Now we will need to either take a picture (or select a picture) to upload. To do this, add the following functions for the click events of “Select Photo” and “Take Photo” buttons:
        PhotoChooserTask photoChooserTask;
        CameraCaptureTask cameraCaptureTask;
        // Constructor
        public MainPage()
        {
            InitializeComponent();
            photoChooserTask = new PhotoChooserTask();
            photoChooserTask.Completed += photoChooserTask_Completed;
            cameraCaptureTask = new CameraCaptureTask();
            cameraCaptureTask.Completed += cameraCaptureTask_Completed;
            // Sample code to localize the ApplicationBar
            //BuildLocalizedApplicationBar();
        }

        void cameraCaptureTask_Completed(object sender, PhotoResult e)
        {
            if (e.TaskResult == TaskResult.OK)
            {
                UploadToAzureBlobStorage(e.ChosenPhoto);
            }
        }

        void photoChooserTask_Completed(object sender, PhotoResult e)
        {
            if (e.TaskResult == TaskResult.OK)
            {
                UploadToAzureBlobStorage(e.ChosenPhoto);
            }
        }

        private void UploadToAzureBlobStorage(Stream chosenPhoto)
        {
            throw new NotImplementedException();
        }

        private void selectImageButton_Click(object sender, RoutedEventArgs e)
        {
            photoChooserTask.Show();
        }

        private void takePhotoButton_Click(object sender, RoutedEventArgs e)
        {
            cameraCaptureTask.Show();
        }
As you can see, we’ve set up the photo chooser task and the camera capture task. The only thing that remains is to fill up the UploadToAzureBlobStorage function where we will perform the uploading process:
            var blobClient = CloudStorageContext.Current.Resolver.CreateCloudBlobClient();
            var container = blobClient.GetContainerReference("images");

            container.CreateIfNotExist(
                BlobContainerPublicAccessType.Container,
                response =>
                {
                    var blob = container.GetBlobReference("picture.jpg");

                    blob.UploadFromStream(
                        chosenPhoto,
                        response2 =>
                        {
                            MessageBox.Show("Upload complete.");
                        });
                });
Aaand our application is ready. Go ahead and try uploading something, just keep in mind that the picture you upload will be visible by everyone if you use the storage credentials I’ve provided in the source code. 🙂
You can get the full source code of the application here.
Have fun. 😀

This has helped me alot. I have a question: How can I get a list of blobs in a container using the same library?
Hi Derek,
This library contains methods that you can use to get the list of containers, and the list of blobs in the containers.
Based on the code I used in this article, you use the following to get the list of containers and blobs:
            blobClient.ListContainers(response =>
                {
                    List<ICloudBlobContainer> containerList = response.Response.ToList();
                });

            container.ListBlobs(response =>
                {
                    List<ICloudBlob> blobList = response.Response.ToList();
                });
You can even make something like this to get the list of containers, and then get the list of blobs for each container:
            List<ICloudBlobContainer> containerList = new List<ICloudBlobContainer>();

            blobClient.ListContainers(response =>
                {
                    containerList = response.Response.ToList();
                });

            foreach (ICloudBlobContainer container in containerList)
            {
                container.ListBlobs(response =>
                {
                    List<ICloudBlob> blobList = response.Response.ToList();
                });
            }
I haven’t run this code but it should work. 🙂 Let me know if you encounter any problems or have any questions.
Hi, I would like to thank you for this great work.
I have a question , I want to get the URL’s of my blobs and the name of my containers in a list , i tried to use this fucntion :
List containerList = new List();
blobClient.ListContainers(response =>
{
containerList = response.Response.ToList();
});
foreach (ICloudBlobContainer container in containerList)
{
container.ListBlobs(response =>
{
List blobList = response.Response.ToList();
});
}
but it don’t work and I don’t know why.
Hi there,
You are right, that code doesn’t work. It’s because the response part is run ascnchronously, so the container list is not filled yet when the foreach part executes; I must have missed it. 🙂 So if you do the following, you can get the containerList (I created a custom class to keep both the container objects and the blobs belonging to each container):
        public class ContainerAndBlobs
        {
            public ICloudBlobContainer Container { get; set; }
            public List<ICloudBlob> Blobs { get; set; }
        }

        List<ContainerAndBlobs> containersWithBlobs;

        private void getContainersButton_Click(object sender, RoutedEventArgs e)
        {
            var blobClient = CloudStorageContext.Current.Resolver.CreateCloudBlobClient();
            List<ICloudBlobContainer> containerList = new List<ICloudBlobContainer>();
            containersWithBlobs = new List<ContainerAndBlobs>();

            blobClient.ListContainers(response =>
            {
                containerList = response.Response.ToList();
                if (containerList.Count != 0)
                {
                    foreach (ICloudBlobContainer containerObject in containerList)
                    {
                        containerObject.ListBlobs("", true, response2 =>  //See my note about this line
                            {
                                containersWithBlobs.Add(new ContainerAndBlobs() { Container = containerObject, Blobs = response2.Response.ToList() });
                            });
                    }
                }
            });
        }
Keep in mind that I got an exception when I directly used ListBlobs method (without any parameters). It may be because of changes made to the API. It worked when I set the “flatBlobListing” property to true. Tell me if this works for you. 🙂
I try to use this code and get the next error code
Server failed to authenticate the request. Make sure the value of Authorization header is formed correctly including the signature.
Any idea why this happens?
Hi,
Are you using your own Azure storage credentials and key, or are you using the one in the example? Because if you are using the credentials in the example (or source code), it won’t work (I had to cancel my Azure subscription).
I use my own credentials (Key, storage name and t(ableendpoint, blobenpoint..))
I’ve looked around a bit and found a few things. Keep in mind that I haven’t been able to reproduce the problem, so I’m just suggesting possible solutions.
1) http://happyfunpartytime.com/2012/11/azure-storage-storageclientexception-http-403-forbidden/http://happyfunpartytime.com/2012/11/azure-storage-storageclientexception-http-403-forbidden/
This blog post says that if you use “\\” for folders (like “foldername\\picture.jpg”) it creates this error. Are you using something like this?
2) http://stackoverflow.com/questions/8807366/azure-blob-storage-download-server-failed-to-authenticate-but-ok-on-retry
In this link the poster says he fixed the problem by using “https://” in the storage uri. Can you try this?
3) http://amiatypist.blogspot.com.tr/2011/06/microsoft-azure-server-failed-to.html
And, in this blog post it is said that the error could be because of a time inconsistency, where your requests to the Azure could be seen as too old. Can you use Fiddler and see what the error is?
Finally, by the way, are you using Windows Phone Emulator or an actual device for testing your code?