
One of the most prominent features of Windows Azure is no doubt Windows Azure SQL Databases, which allows us to have a database on the cloud and benefit from the advantages of cloud computing, such as high-availability and scalability. Azure’s portal interface allows us to easily manage the database, and by using a cloud service as an API for our backend we can quickly access the database from any platform.
In this step by step article, we’ll create a Windows Azure SQL Database, create a web service which connects to this database and allows us to perform specific operations on it and then use that web service in a Windows Store app.
1) Creating the Windows Azure SQL Database
Obviously, you’ll need to have an Azure account to do this. You can go to http://www.windowsazure.com and click on the Free Trial option on the upper right and follow the instructions to get a free 1 month trial. Keep in mind that although it is free, you still need to enter a valid credit card information for validation purposes.

After you get an Azure account (or if you already have one), click “Portal” on the upper right or go to http://manage.windowsazure.com and log into the Management Portal.
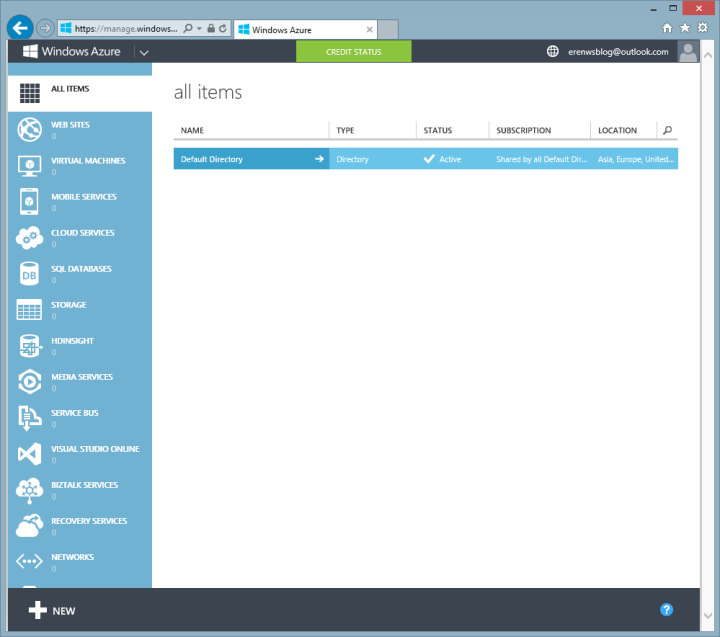
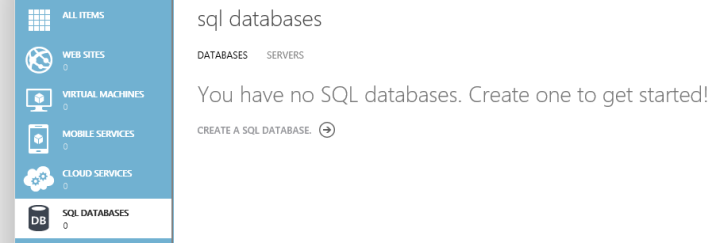
As you see, we have a list of the features we can use in Azure on the left side. To start creating the database, select SQL Databases and then click “Create a SQL Database”.
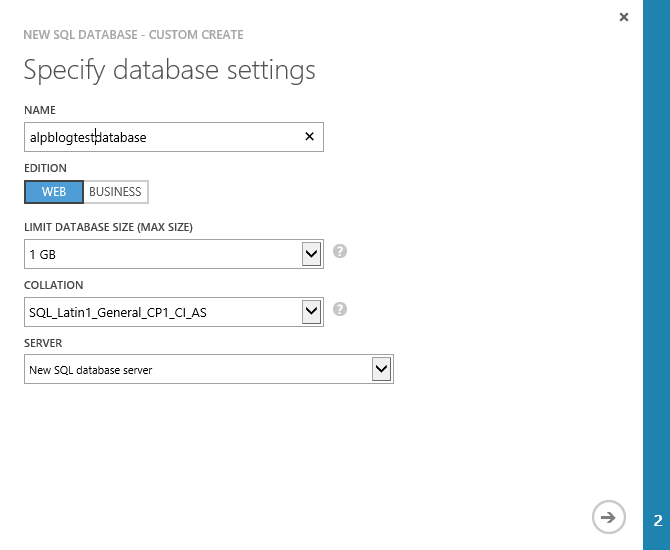
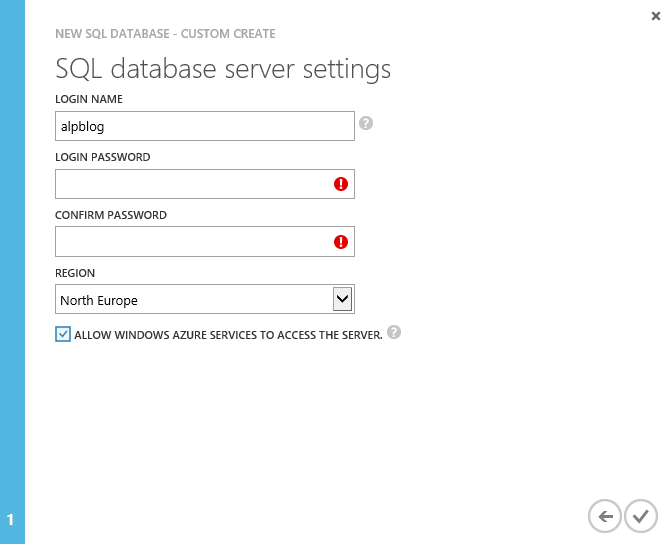
In the screen that opens, give your database a meaningful name, select the maximum size and select the server in which you wish to create the database. If you don’t have a server yet, or if you want to, you can select to create a new server. If you are creating a server, you’ll define a username and password, which will be used to access your database.
After clicking OK, your database will be created and listed. Our next step will be opening our database and creating the tables in it. To do that, select your database and click the Manage button on the bottom of the screen (or click the name of your database, go to the Dashboard tab and click the Manage URL).
If you are connecting for the first time, you will be prompted if you want to add the current IP address to the firewall rules. This is a server-level firewall that allows connections only from specific IP addresses. Click Yes to add your own IP because we will connect to it now (you can remove it after you are done, if you wish). If you are wondering how our app will access the database, you’ll see a “Allow Windows Azure Services to Access the Server” option in the screenshot above. This option adds a special firewall rule that will allow our cloud service to access the database and therefore only our web service will be able to access it, adding a layer of security.


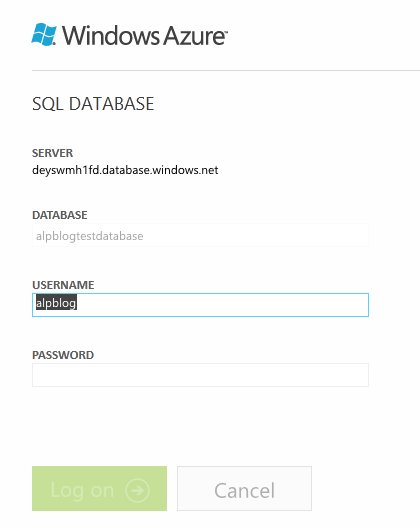
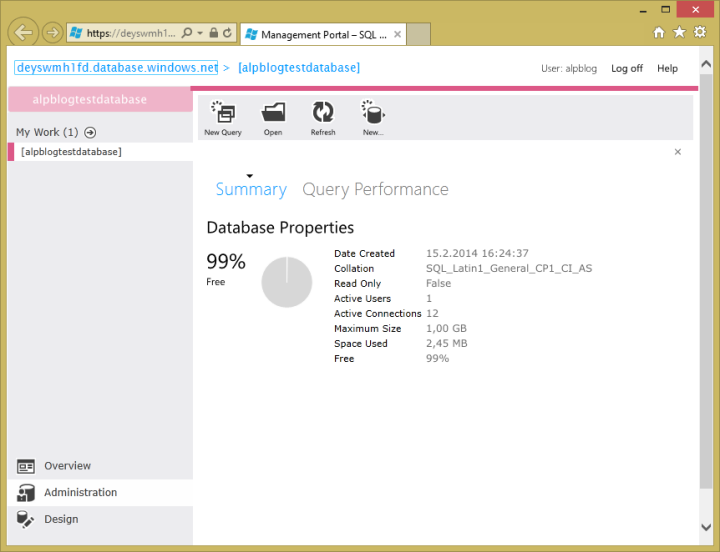
Then, the database management portal will appear. Use the username and password you’ve entered when creating the server to log in.
In the database management portal, click “Design” on the lower left corner of the screen and then click “New Table”.

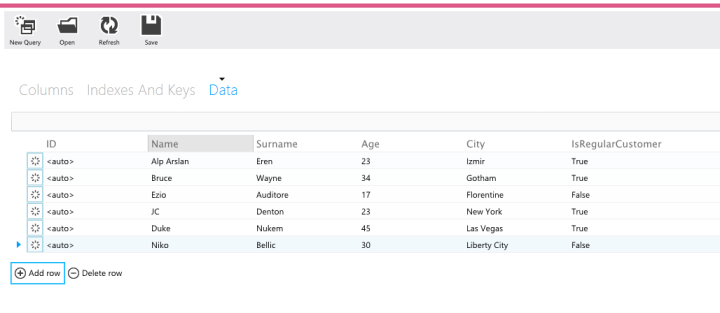
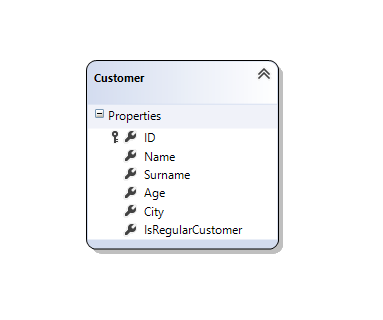
For this article, I’ll create a Customer table that contains a customer’s ID, name, surname, age, city and whether the customer is a regular or not, which will look like this:

Click Save to create the table, then click the Data tab to add a few sample entries to the table:
After saving the sample rows you’ve entered, we’re now ready to prepare the cloud service. 🙂 You can close the database management portal (but keep the main Azure portal open, we still have work in there :)).
2) Creating the Windows Azure Cloud Service
To create the Azure cloud service, you need to have the Azure SDK installed. If you haven’t already, you can get it from here. I’ll be using Visual Studio 2013 in this article.
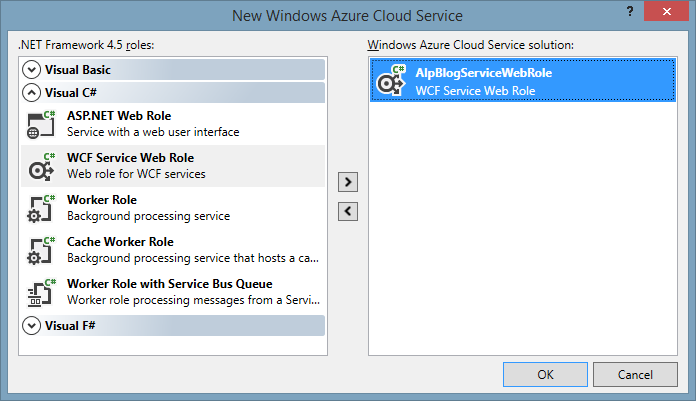
So, open up Visual Studio, create a new Windows Azure Cloud Service project, and add a WCF Service Web Role.

After the project is created, delete the default sample methods in the service. You can also change the default Service names by using the Rename command of Visual Studio to give a more meaningful name. You can even change the file names too. In the end, the service and interface files will look like the following:

In AlpBlogService.svc:
namespace AlpBlogServiceWebRole
{
    public class AlpBlogService : IAlpBlogService
    {
    }
}
In IAlpBlogService.cs:
namespace AlpBlogServiceWebRole
{
    [ServiceContract]
    public interface IAlpBlogService
    {
    }
}
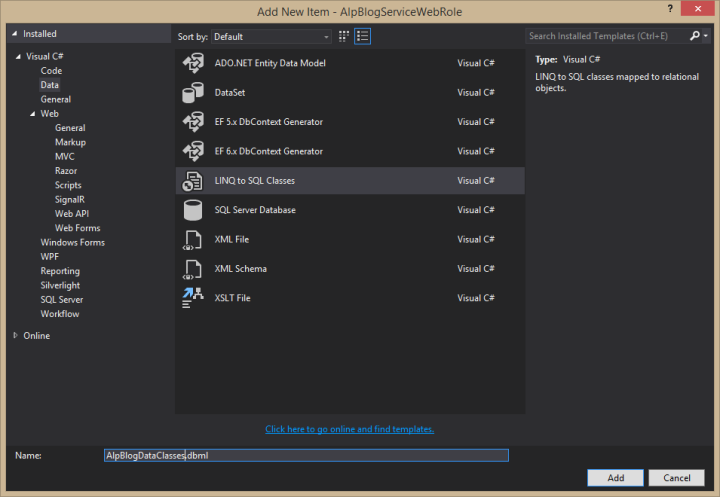
Ok then, time to connect to our database. We’ll be using LINQ To SQL to map our database table to a .NET class so that we can use it in the web service. To do this, right click the web role project, select Add -> New Item and add a new LINQ To SQL Data Classes file.
Next, we need to connect to the database. To do this, open the Server Explorer window in Visual Studio (under View -> Server Explorer), right click the Data Connections, click Add Connection.

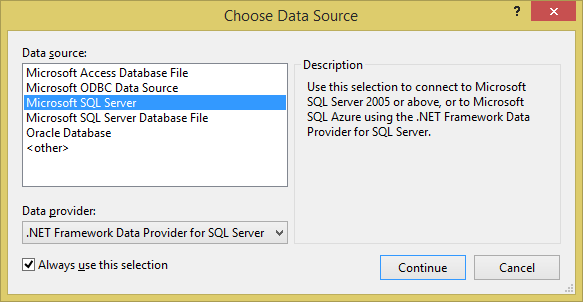
In the window that appears, select Microsoft SQL Server and click continue.
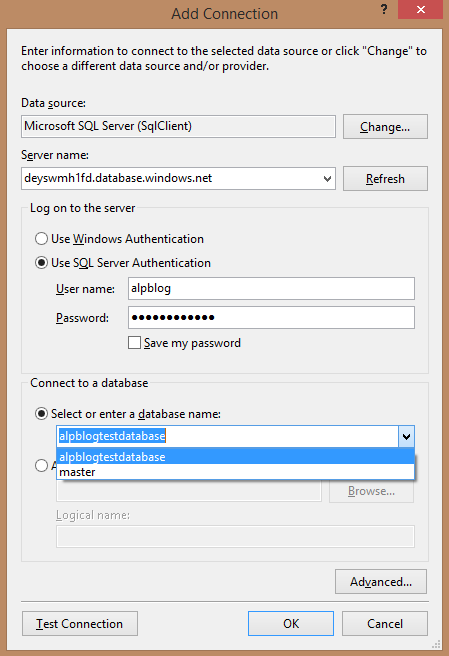
Next, we’ll need to enter the name of our database server. In Azure portal, click the name of your database, and in the Dashboard tab, you’ll see the name of your server on the right side.

Enter the name of your database server, select “Use SQL Authentication” and then enter the username and password of your server that you’ve entered at the beginning of the article. If all is well, you’ll be able to select the database.
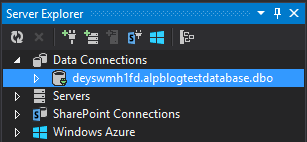
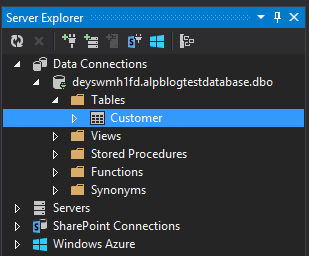
After clicking OK, you’ll be able to see your database in Server Explorer window.
Now, expand the database until you see the Customer table, then drag it onto the LINQ To SQL Data Classes file open in Visual Studio.
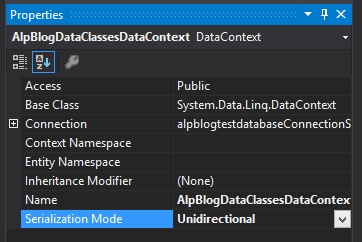
Note: When you are working with this, I recommend you to set the Serialization Mode property of your LINQ To SQL Data Classes file to “Unidirectional”. Otherwise, you may get a not so nice error about circular references and not being able to serialize. If you want more info about this, check out the answer in this link.
Since our Customer class is ready, we can now create the web methods. We’re going to need 4 methods: adding a new customer, deleting a customer, modifying an existing customer and getting the list of customers. To do this, you can add the following methods and the corresponding operation contracts:
In AlpBlogService.svc:
    public class AlpBlogService : IAlpBlogService
    {
        AlpBlogDataClassesDataContext data = new AlpBlogDataClassesDataContext();

        public bool addNewCustomer(Customer newCustomer)
        {
            try
            {
                data.Customers.InsertOnSubmit(newCustomer);
                data.SubmitChanges();
                return true;
            }
            catch
            {
                return false;
            }
        }

        public bool deleteCustomer(int customerID)
        {
            try
            {
                Customer customerToDelete = (from customer in data.Customers
                                             where customer.ID == customerID
                                             select customer).Single();
                data.Customers.DeleteOnSubmit(customerToDelete);
                data.SubmitChanges();
                return true;
            }
            catch
            {
                return false;
            }
        }

        public bool modifyCustomer(Customer newCustomer)
        {
            try
            {
                Customer customerToModify = (from customer in data.Customers
                                             where customer.ID == newCustomer.ID
                                             select customer).Single();
                customerToModify.Age = newCustomer.Age;
                customerToModify.City = newCustomer.City;
                customerToModify.IsRegularCustomer = newCustomer.IsRegularCustomer;
                customerToModify.Name = newCustomer.Name;
                customerToModify.Surname = newCustomer.Surname;
                data.SubmitChanges();
                return true;
            }
            catch
            {
                return false;
            }
        }

        public List<Customer> getCustomers()
        {
            try
            {
                return (from customer in data.Customers
                        select customer).ToList();
            }
            catch
            {
                return null;
            }
        }
    }
}
In IAlpBlogService.cs:
    [ServiceContract]
    public interface IAlpBlogService
    {
        [OperationContract]
        bool addNewCustomer(Customer newCustomer);

        [OperationContract]
        bool deleteCustomer(int customerID);

        [OperationContract]
        bool modifyCustomer(Customer newCustomer);

        [OperationContract]
        List<Customer> getCustomers();
    }
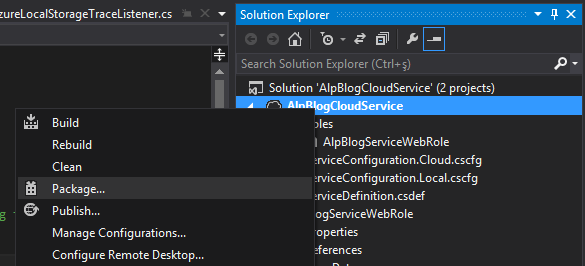
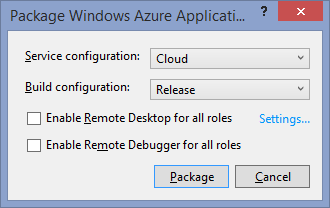
The last thing we need to do with our cloud service before we can use it is to deploy it. 🙂 To do this, right click the cloud service project, select Package and then create a package of the cloud service. When the packaging is complete, the folder that contains the package will open.

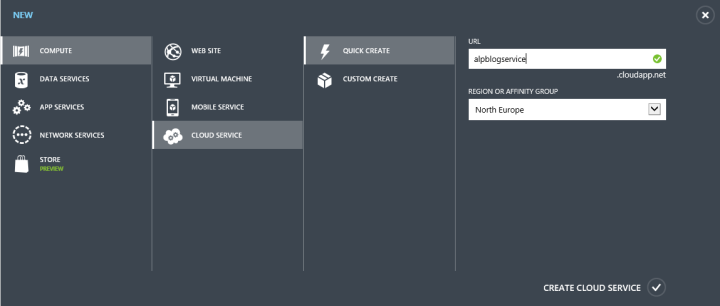
Now switch back to Azure portal, select Cloud Services, click Create a Cloud Service and then enter a unique URL for the cloud service. This is the URL we’ll use to reach the web service. You can also select a region here.
After your cloud service is created and listed in the portal, click its name, go to Dashboard tab and click “Upload a New Production Deployment”. In the window that opens, give your deployment a name, select the package and configuration files and then click OK to start the deployment.

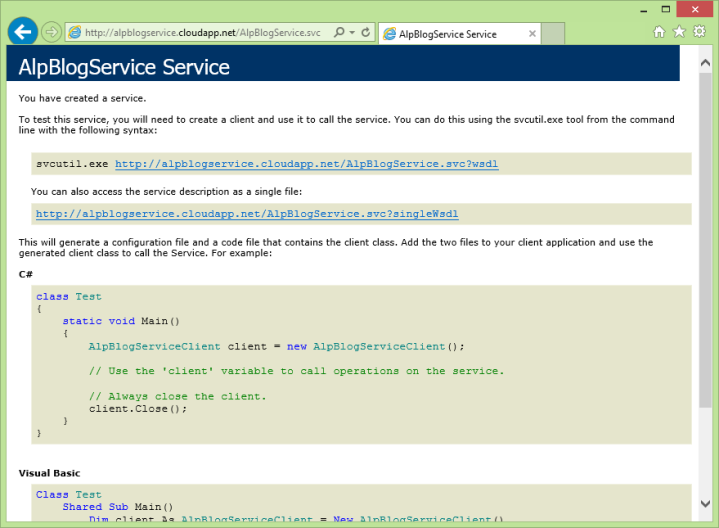
The package will be uploaded and then deployed, which may take a few minutes. After that, the web service will be ready. You can check if the web service is working by visiting the cloud service in your browser after the deployment is complete.
All we need now is a client. 🙂
3) Creating the Windows Store app client
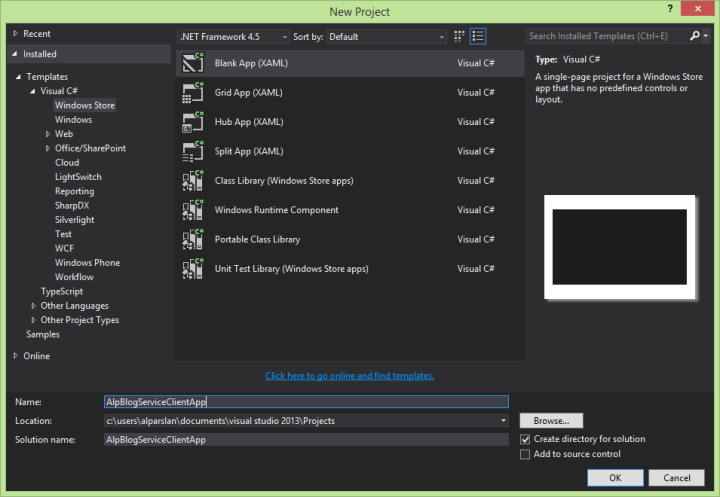
We’ll start by creating a new blank Windows Store app project in Visual Studio.
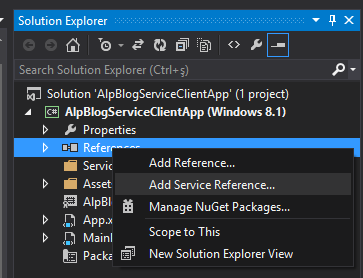
Before doing anything else, we’ll first add the service reference. To do this, right click References in Solution Explorer, select “Add Service Reference”, enter the URL of our cloud service and click “Go”.
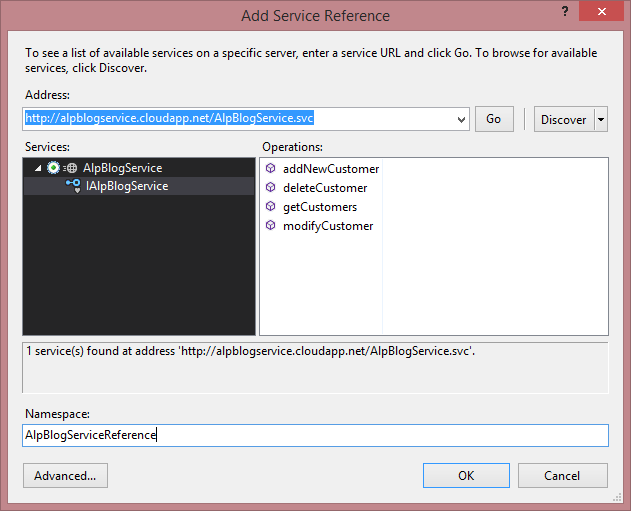
Click OK to add the service reference. After adding a basic interface that includes a GridView to display the data and several other controls to delete – add – modify the customers, and the code that calls the web methods; MainPage.xaml and MainPage.xaml.cs files will look like the following:
<Page
    x:Class="AlpBlogServiceClientApp.MainPage"
    xmlns="http://schemas.microsoft.com/winfx/2006/xaml/presentation"
    xmlns:x="http://schemas.microsoft.com/winfx/2006/xaml"
    xmlns:local="using:AlpBlogServiceClientApp"
    xmlns:d="http://schemas.microsoft.com/expression/blend/2008"
    xmlns:mc="http://schemas.openxmlformats.org/markup-compatibility/2006"
    mc:Ignorable="d">
    <Page.Resources>
        <DataTemplate x:Key="GridViewCustomersDataTemplate">
            <Grid Width="300" Background="#FF5D5AA0" Height="102">
                <StackPanel Margin="10,22,0,0" Orientation="Horizontal" VerticalAlignment="Top">
                    <TextBlock HorizontalAlignment="Left" TextWrapping="Wrap" Text="Surname:" VerticalAlignment="Top"/>
                    <TextBlock VerticalAlignment="Top" TextWrapping="NoWrap" Text="{Binding Surname}" Margin="5,0,0,0"/>
                </StackPanel>
                <StackPanel Margin="10,76,0,0" Orientation="Horizontal" VerticalAlignment="Top">
                    <TextBlock HorizontalAlignment="Left" TextWrapping="Wrap" Text="Regular Customer:" VerticalAlignment="Top"/>
                    <TextBlock VerticalAlignment="Top" TextWrapping="NoWrap" Text="{Binding IsRegularCustomer}" Margin="5,0,0,0"/>
                </StackPanel>
                <StackPanel Margin="10,4,0,0" Orientation="Horizontal" VerticalAlignment="Top">
                    <TextBlock HorizontalAlignment="Left" TextWrapping="Wrap" Text="Name:" VerticalAlignment="Top"/>
                    <TextBlock VerticalAlignment="Top" TextWrapping="NoWrap" Text="{Binding Name}" Margin="5,0,0,0"/>
                </StackPanel>
                <StackPanel Margin="10,40,0,0" Orientation="Horizontal" VerticalAlignment="Top">
                    <TextBlock HorizontalAlignment="Left" TextWrapping="Wrap" Text="Age:" VerticalAlignment="Top"/>
                    <TextBlock VerticalAlignment="Top" TextWrapping="NoWrap" Text="{Binding Age}" Margin="5,0,0,0"/>
                </StackPanel>
                <StackPanel Margin="10,58,0,0" Orientation="Horizontal" VerticalAlignment="Top">
                    <TextBlock HorizontalAlignment="Left" TextWrapping="Wrap" Text="City:" VerticalAlignment="Top"/>
                    <TextBlock VerticalAlignment="Top" TextWrapping="NoWrap" Text="{Binding City}" Margin="5,0,0,0"/>
                </StackPanel>
            </Grid>
        </DataTemplate>
    </Page.Resources>

    <Grid Background="{ThemeResource ApplicationPageBackgroundThemeBrush}">
        <GridView x:Name="GridViewCustomers" Margin="400,80,0,30" SelectionChanged="GridViewCustomers_SelectionChanged" ItemTemplate="{StaticResource GridViewCustomersDataTemplate}"/>
        <StackPanel Margin="100,80,0,0" Width="295" HorizontalAlignment="Left">
            <TextBlock TextWrapping="Wrap" Text="Name:" FontFamily="Segoe UI" FontSize="15" FontWeight="Light" Margin="0,0,0,5"/>
            <TextBox x:Name="TextBoxName" TextWrapping="Wrap" Margin="0,0,0,10"/>
            <TextBlock TextWrapping="Wrap" Text="Surname:" FontFamily="Segoe UI" FontSize="15" FontWeight="Light" Margin="0,0,0,5"/>
            <TextBox x:Name="TextBoxSurname" TextWrapping="Wrap" Margin="0,0,0,10"/>
            <TextBlock TextWrapping="Wrap" Text="City:" FontFamily="Segoe UI" FontSize="15" FontWeight="Light" Margin="0,0,0,5"/>
            <TextBox x:Name="TextBoxCity" TextWrapping="Wrap" Margin="0,0,0,10"/>
            <Grid Margin="0,0,0,10">
                <TextBlock TextWrapping="Wrap" Text="Age:" FontFamily="Segoe UI" FontSize="15" FontWeight="Light" Margin="0,5,0,0" HorizontalAlignment="Left" VerticalAlignment="Top"/>
                <TextBox x:Name="TextBoxAge" TextWrapping="Wrap" Margin="34,0,0,0" HorizontalAlignment="Left" VerticalAlignment="Top"/>
                <CheckBox x:Name="CheckBoxRegularCustomer" Content="Regular Customer" HorizontalAlignment="Left" Margin="140,2,0,0" VerticalAlignment="Top" FontWeight="Light"/>
            </Grid>
            <Button x:Name="ButtonAdd" Content="Add New Customer" HorizontalAlignment="Left" VerticalAlignment="Stretch" Margin="0,0,0,10" Width="211" Click="ButtonAdd_Click"/>
            <Button x:Name="ButtonDelete" Content="Delete Selected Customer" HorizontalAlignment="Left" VerticalAlignment="Stretch" Margin="0,0,0,10" Width="211" Click="ButtonDelete_Click"/>
            <Button x:Name="ButtonModify" Content="Modify Selected Customer" HorizontalAlignment="Left" VerticalAlignment="Stretch" Margin="0,0,0,10" Click="ButtonModify_Click"/>
        </StackPanel>
        <ProgressBar x:Name="ProgressBar" VerticalAlignment="Top" Visibility="Collapsed"/>
    </Grid>
</Page>
using System;
using System.Collections.Generic;
using System.IO;
using System.Linq;
using System.Runtime.InteropServices.WindowsRuntime;
using Windows.Foundation;
using Windows.Foundation.Collections;
using Windows.UI.Xaml;
using Windows.UI.Xaml.Controls;
using Windows.UI.Xaml.Controls.Primitives;
using Windows.UI.Xaml.Data;
using Windows.UI.Xaml.Input;
using Windows.UI.Xaml.Media;
using Windows.UI.Xaml.Navigation;
using AlpBlogServiceClientApp.AlpBlogServiceReference;
using Windows.UI.Popups;

// The Blank Page item template is documented at http://go.microsoft.com/fwlink/?LinkId=234238

namespace AlpBlogServiceClientApp
{
    /// <summary>
    /// An empty page that can be used on its own or navigated to within a Frame.
    /// </summary>
    public sealed partial class MainPage : Page
    {
        AlpBlogServiceClient webService = new AlpBlogServiceClient();

        public MainPage()
        {
            this.InitializeComponent();
            this.Loaded += MainPage_Loaded;
        }

        void MainPage_Loaded(object sender, RoutedEventArgs e)
        {
            getCustomers();
        }

        async void getCustomers()
        {
            try
            {
                ProgressBar.IsIndeterminate = true;
                ProgressBar.Visibility = Visibility.Visible;
                GridViewCustomers.ItemsSource = await webService.getCustomersAsync();
                ProgressBar.Visibility = Visibility.Collapsed;
                ProgressBar.IsIndeterminate = false;
            }
            catch (Exception ex)
            {
                MessageDialog messageDialog = new MessageDialog(ex.Message);
                messageDialog.ShowAsync();
                ProgressBar.Visibility = Visibility.Collapsed;
                ProgressBar.IsIndeterminate = false;
            }
        }

        private void GridViewCustomers_SelectionChanged(object sender, SelectionChangedEventArgs e)
        {
            if(e.AddedItems.Count != 0)
            {
                Customer selectedCustomer = e.AddedItems[0] as Customer;
                TextBoxName.Text = selectedCustomer.Name;
                TextBoxSurname.Text = selectedCustomer.Surname;
                TextBoxCity.Text = selectedCustomer.City;
                TextBoxAge.Text = selectedCustomer.Age.ToString();
                if(selectedCustomer.IsRegularCustomer == true)
                {
                    CheckBoxRegularCustomer.IsChecked = true;
                }
                else
                {
                    CheckBoxRegularCustomer.IsChecked = false;
                }
            }
        }

        async private void ButtonAdd_Click(object sender, RoutedEventArgs e)
        {
            try
            {
                ProgressBar.IsIndeterminate = true;
                ProgressBar.Visibility = Visibility.Visible;
                Customer newCustomer = new Customer();
                newCustomer.Name = TextBoxName.Text;
                newCustomer.Surname = TextBoxSurname.Text;
                newCustomer.Age = Int32.Parse(TextBoxAge.Text);
                newCustomer.City = TextBoxCity.Text;
                if(CheckBoxRegularCustomer.IsChecked == true)
                {
                    newCustomer.IsRegularCustomer = true;
                }
                else
                {
                    newCustomer.IsRegularCustomer = false;
                }
                bool result = await webService.addNewCustomerAsync(newCustomer);
                ProgressBar.Visibility = Visibility.Collapsed;
                ProgressBar.IsIndeterminate = false;
                if(result == true)
                {
                    MessageDialog messageDialog = new MessageDialog("Customer successfully added.");
                    await messageDialog.ShowAsync();
                }
                else
                {
                    MessageDialog messageDialog = new MessageDialog("Customer couldn't be added.");
                    await messageDialog.ShowAsync();
                }
                getCustomers();
            }
            catch (Exception ex)
            {
                MessageDialog messageDialog = new MessageDialog(ex.Message);
                messageDialog.ShowAsync();
                ProgressBar.Visibility = Visibility.Collapsed;
                ProgressBar.IsIndeterminate = false;
            }
        }

        async private void ButtonDelete_Click(object sender, RoutedEventArgs e)
        {
            if(GridViewCustomers.SelectedItem != null)
            {
                try
                {
                    ProgressBar.IsIndeterminate = true;
                    ProgressBar.Visibility = Visibility.Visible;
                    bool result = await webService.deleteCustomerAsync((GridViewCustomers.SelectedItem as Customer).ID);
                    if (result == true)
                    {
                        MessageDialog messageDialog = new MessageDialog("Customer successfully deleted.");
                        await messageDialog.ShowAsync();
                    }
                    else
                    {
                        MessageDialog messageDialog = new MessageDialog("Customer couldn't be deleted.");
                        await messageDialog.ShowAsync();
                    }
                    getCustomers();
                }
                catch (Exception ex)
                {
                    MessageDialog messageDialog = new MessageDialog(ex.Message);
                    messageDialog.ShowAsync();
                    ProgressBar.Visibility = Visibility.Collapsed;
                    ProgressBar.IsIndeterminate = false;
                }
            }
        }

        async private void ButtonModify_Click(object sender, RoutedEventArgs e)
        {
            try
            {
                ProgressBar.IsIndeterminate = true;
                ProgressBar.Visibility = Visibility.Visible;
                Customer newCustomer = new Customer();
                newCustomer.ID = (GridViewCustomers.SelectedItem as Customer).ID;
                newCustomer.Name = TextBoxName.Text;
                newCustomer.Surname = TextBoxSurname.Text;
                newCustomer.Age = Int32.Parse(TextBoxAge.Text);
                newCustomer.City = TextBoxCity.Text;
                if (CheckBoxRegularCustomer.IsChecked == true)
                {
                    newCustomer.IsRegularCustomer = true;
                }
                else
                {
                    newCustomer.IsRegularCustomer = false;
                }
                bool result = await webService.modifyCustomerAsync(newCustomer);
                ProgressBar.Visibility = Visibility.Collapsed;
                ProgressBar.IsIndeterminate = false;
                if (result == true)
                {
                    MessageDialog messageDialog = new MessageDialog("Customer successfully modified.");
                    await messageDialog.ShowAsync();
                }
                else
                {
                    MessageDialog messageDialog = new MessageDialog("Customer couldn't be modified.");
                    await messageDialog.ShowAsync();
                }
                getCustomers();
            }
            catch (Exception ex)
            {
                MessageDialog messageDialog = new MessageDialog(ex.Message);
                messageDialog.ShowAsync();
                ProgressBar.Visibility = Visibility.Collapsed;
                ProgressBar.IsIndeterminate = false;
            }
        }
    }
}
When we run the app, it will display the customers in the database and we could add, delete or modify the customers using the buttons.

The initial customer list.

After adding a new customer.

After modifying the new customer.
That’s it. 🙂
I’m not going to provide the full project files, because the cloud service I created will be unavailable after the trial period anyway. Therefore, if you encounter any problems when following these steps, leave a comment below. 🙂
4) Notes
Before finishing the article, I’d like to explain some small issues we need to take into consideration.
First of all, you may think of just adding the data classes to your client instead of a web service and connect to the database directly. This may look easier to you since you don’t have to work on a web service, but I don’t recommend it as it has some disadvantages, such as:
– The web service here acts like an API for your backend; therefore you can consume it from different platforms easily. For example, assume you’ve deployed your app to Windows Store and after some time you’ve decided to make an Android app. Instead of connecting to the database from within Android, you can just consume the web service you’ve already created.
– You can also add user validation, filtering or other logic in the web service, which you will not need to rewrite in each client.
– When you encounter a bug in the web service or want to change something, you can just fix it and redeploy your web service without needing to update your clients.
If you want a more thorough list, check out the answer in this link.
Second, you need to be very careful about the security of your web service. For example, we currently don’t have any kind of validation, so anyone can just use our web service to connect to the database and play with our customer data. To prevent this, you may require the web methods to receive user login information, then perform the operation only if that information is correct. You can also set the “httpGetEnabled” property to false in the web.config file of your cloud service (after getting the service reference in your client), which will prevent other people from getting your web service’s connection information. Also don’t forget to set “directoryBrowse enabled” property to false too, so other people can not browse your cloud service’s directory.
Finally, even if you make your web service secure using the above methods, the data you transfer can be clearly seen by someone monitoring the network. To prevent this, use https protocol in your cloud service.
Thank your for reading. 🙂

Thank you for posting this within a short notice! Genius!
I have a question. I understand that Azure account has free trial for 1 month or whatever days. But I also see something like Windows Azure sdk in the Dreamspark account that Microsoft provides for university students. Do you know anything about that?
I have just checked the DreamSpark website. There is an Azure section but it does not contain an extra trial or any other option with more days. The only offer apart from the default 1 month trial is Windows Azure academic passes, which allows educators (that will use Azure as part of their classes) to get a 12 month pass for themselves and 6 month passes for their students. So unless you can convince an educator in your university to give a class which utilizes Azure, you are out of luck.
The only other possibility I can think of is being a Microsoft Student Partner; I think they could give a pass then.
Thanks for the info 🙂
Keep posting more of these great tutorials
Very nice tutorial! Really clear.
Excellent Tutorial…
Very Very Helpful……..
Hello again! I have a question. I understand that I can use sql in Azure when I need something like a global data storage. What is the best option for a local sql storage in Windows Store Apps? Did you write anything like that?
Thanks.
If you directly want a local SQL storage in Windows Store Apps, I believe you can use SQLite. I currently don’t have anything written about it; but, as always, I was looking for an article to write in the weekend. 🙂 So If I can find enough time, I’ll write one in a few days about how to use SQLite.
I came by a problem. The steps 1,2,3 are very clear here and highly coherent.
1. What if I discover that I need a change in my database schema? I guess that is quite natural to happen.
2. I may also need multiple tables afterwards.
As far as I can see, we create a package and upload that in the azure in step 2. So what to do when I come by problems 1 and 2 mentioned above.
Thanks 🙂
If by “a change in database schema” you mean modifying your tables, stored procedures etc. after you create them, you can just open your Linq To SQL Classes file in your Azure project, delete the items (tables, stored procedures etc.) you’ve modified and then redrag them from the server explorer. Your changes will then be reflected in your classes. For example, assume I wanted to change the Age field in the example from an int to a string. All I need to do is open the Customer table in Azure portal, change the field to nvarchar, then recreate its Linq to SQL class in my Azure cloud service project and then upload the project again.
And as for your next question, the solution is the same. After creating your new tables, you can just drag and drop them into your existing Linq to SQL Classes file. 🙂
Actually, here’s a good tip: As long as you don’t make a breaking change in your database tables, your existing web service will continue to work. For example, assume I’ve added another field to the Customer table. My web service won’t use that field, but it’ll keep working.
Tell me if this answers your questions. 🙂
Surely it does 😀 So basically when you change something in the database table, you restart from the point where you created the LINQ to SQL file, delete the old one, create a new one (using the same name, else namespace error), drag, save, recreate package and upload it like before.
Then in the client app, you right click the service reference and click update.
Thanks for all the hard work 😀 will try to add another table and check again.
Yes, that’s exactly what you need to do, you’ve summed it up greatly. 😀
You don’t need to delete the whole Linq To SQL file though. Just delete the table in there and then drag it, no need to recreate the whole file. 🙂
Thanks for posting this, helped out a lot making my web service 🙂 Question, is there a way to access the soap message in the addNewClient method? My web service send an InfoPath form in the message body so I need to make the customer object in the web service. This has been amazingly helpful.
Exactly what I need, brilliant tutorial! Thank you.
Hello,
can we do this all procedure for windows phone app?
Yes, you can do all of it the same way for Windows Phone. 🙂
Great work,
Many thanks,
Omar
Great stuff, thanks!
Let’s say I want to use this app to manage sensitive data…
Any tips on how I can use Active Directory access management to restrict access to the service to certain users/devices? Can you recommend a tutorial?
This is an informative guide on setting up Windows Azure SQL Database.