
The web.config file contains the configuration options for a web service, some of which could contain sensitive information that you don’t want to be kept in plain text. For example, it is very likely that you’ll connect to a database in your web service, and the connection string you use will be kept in the web.config file. The connection string includes the username and password used in the database server, so if you plan to keep your web service in a 3rd party server or if someone that you don’t want to learn the database credentials needs to work on the source code, you could add an extra layer of security by encrypting this data.
<connectionStrings>
  <add name="DatabaseConnectionString" connectionString="Data Source=blablabla.database.windows.net;Initial Catalog=BlaBlaDB;User ID=yourusername;Password=yourpassword"
    providerName="System.Data.SqlClient" />
</connectionStrings>
.NET Framework provides a feature called “protected configuration” which prevents our data from being shown like in the code above, by encrpyting the configuration data using DpapiProtectedConfigurationProvider or RsaProtectedConfigurationProvider classes. However, both of these two encryption methods need to be applied on the server that hosts the web service, because the encrpytion process uses a machine-specific key. Since we can’t do this on Azure… what can we do to encrypt the web.config of our cloud services?
Well, if we want to encrpyt our web.config files in Azure cloud services, we need to use a special “protected configuration provider”. In this article, we’ll create a .pfx certificate and use “Pkcs12 Protected Configuration Provider” which performs the encryption using a certificate and Windows Azure Certificate Store, to encrypt our web.config file.
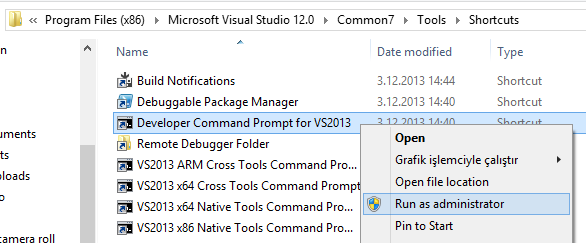
We’ll start by creating the certificate we’ll use. Open the Visual Studio Developer Command Prompt (run it as administrator) and enter the following command:
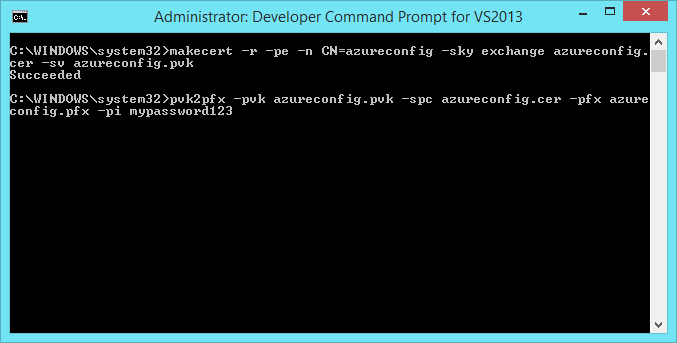
makecert -r -pe -n CN=azureconfig -sky exchange azureconfig.cer -sv azureconfig.pvk
(If you can’t find the developer command prompt, this is where its shortcut is in VS 2013: C:\Program Files (x86)\Microsoft Visual Studio 12.0\Common7\Tools\Shortcuts)

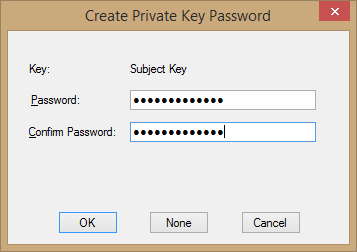
When you run this command, you’ll be asked for a password. We’ll be using this password in the following steps, so don’t forget what you enter here. For this article, I’ll be entering “mypassword123”.

Next, we’ll run the following command to create the .pfx file:
pvk2pfx -pvk azureconfig.pvk -spc azureconfig.cer -pfx azureconfig.pfx -pi the-password-in-previous-step
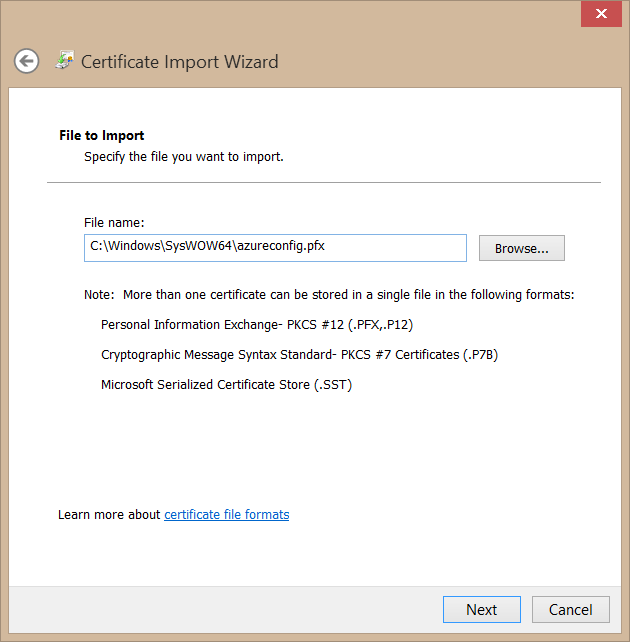
After running this command, our .pfx file will be created. You can check this by browsing to the folder the command prompt was in. If you are using 64-bit Windows, it will be in “C:\Windows\SysWOW64” folder.

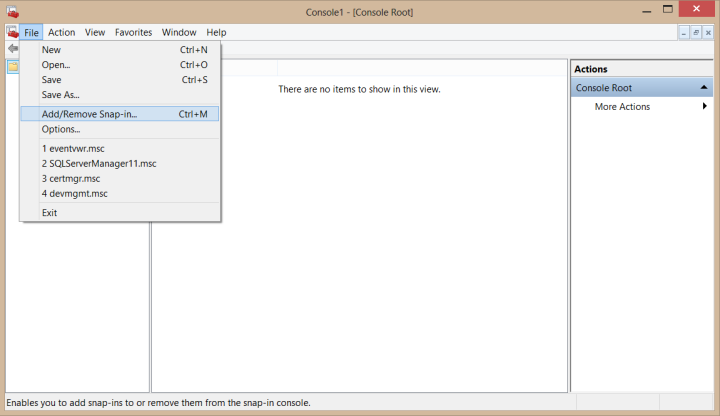
So far so good. Our next step will be adding this certificate to our local machine’s certificate store. We’ll achieve this by using Microsoft Management Console, so we’ll continue by running MMC (you can just search for “mmc” in Windows 8).

In MMC, select “Add/Remove Snap-in” under the File menu.
In the screen that opens, select “Certificates”, then “Computer account” and then “Local computer”, and click Finish.


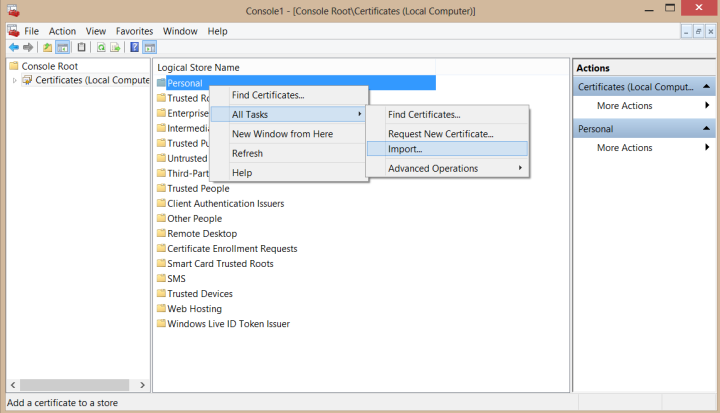
Then click OK to return to MMC. In the Certificates section we’ve just added, right click “Personal”, point to “All Tasks” and click “Import”. Then select the .pfx file we’ve created and enter the password you used.


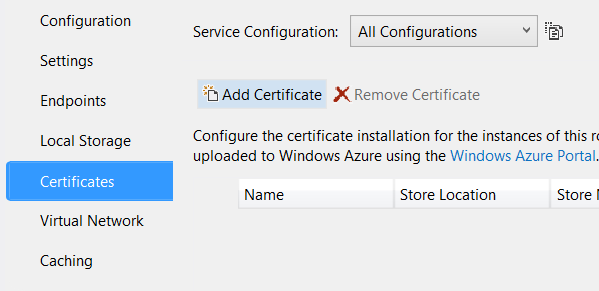
Our certificate is now ready to be used by our Azure project. To do this, open your Azure Cloud Service project, right click the role under the Roles folder and click Properties. Then select Certificates tab and click the Add Certificate button.

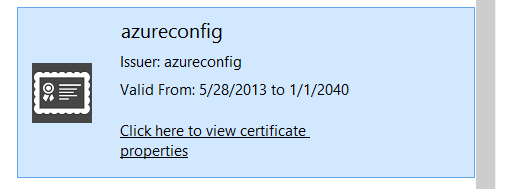
After clicking “Add Certificate”, click the “…” button near the Thumbprint value and select the “azureconfig” certificate from the list. You can give a name to your certificate here, if you wish.

Our next step will be encrypting the web.config file using our certificate. To do this, we need to add the PKCS12ProtectedConfigurationProvider.dll file to the project. You will need to download the source code of the project from here (PKCS12ProtectedConfigurationProvider.zip) and build it to create the .dll file.
Or, you could just download the .dll that I’ve already compiled from the source code, from this link. 🙂
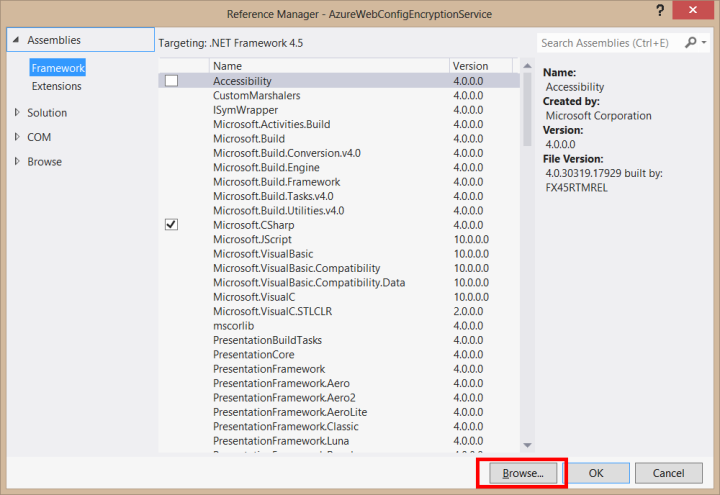
Either way, add the .dll file to the web service project, by right clicking References, selecting Add Reference and browsing to the .dll file’s location.
Then, add the following code to the web.config file in order to use the protected configuration provider (you need to add your own certificate’s thumbprint value here, which you could find in the page we added the certificate):
configProtectedData>
    <providers>
      <add name="CustomProvider" thumbprint="86050A6EDF846DC3F58422F8F8F8380A2A477E97"
           type="Pkcs12ProtectedConfigurationProvider.Pkcs12ProtectedConfigurationProvider, PKCS12ProtectedConfigurationProvider, Version=1.0.0.0, Culture=neutral, PublicKeyToken=34da007ac91f901d"/>
    </providers>
</configProtectedData>
To perform the encrpytion, open Visual Studio developer command prompt again, navigate to the folder that contains web.config file and run the following command:
aspnet_regiis -pef connectionStrings . -prov CustomProvide


Very important note: If you get an error in aspnet_regiis command that says it could not load the PKCS12ProtectedConfigurationProvider assembly, follow the method that is marked as answer on this link to solve it.
After running this command, we’ll have successfully encrpyted the web.config file. If you open it now, you’ll see that the connection string is encrypted:
<connectionStrings configProtectionProvider="CustomProvider">
  <EncryptedData Type="http://www.w3.org/2001/04/xmlenc#Element"
    xmlns="http://www.w3.org/2001/04/xmlenc#">
    <EncryptionMethod Algorithm="http://www.w3.org/2001/04/xmlenc#aes192-cbc" />
    <KeyInfo xmlns="http://www.w3.org/2000/09/xmldsig#">
      <EncryptedKey xmlns="http://www.w3.org/2001/04/xmlenc#">
        <EncryptionMethod Algorithm="http://www.w3.org/2001/04/xmlenc#rsa-1_5" />
        <KeyInfo xmlns="http://www.w3.org/2000/09/xmldsig#">
          <KeyName>rsaKey</KeyName>
        </KeyInfo>
        <CipherData>
          <CipherValue>bWrpsznvy5CXkuzvoR+v5tIQdCsqHC2wWkpw3IsyMf4+p/43LSsTdvkGUbUYevkRhb6EMgrTgPqBqs0bZJLkGiMxVxCDXpwWDVt7JusQUX58TnvgUtS/EmTg3CQt+lkgV3715VCybroYFKW53UL79jYqJM/mbC8aEj0KofnKY6shq8f8iP8KGrAGG8yl44BcMVnGGzm6fvfJOUs96/lqwbNcYEaAMX178OdIOXiiFi9Pf1JaqbjZtVJB4svlNztIflF1eF9bQt+Sey20Ppw8A6jN+sXycYV4zCts+j65KrpzMf7MqUs3lU1ayoQyegZShoYHGa81D+bhaSb9QSrCgQ==</CipherValue>
        </CipherData>
      </EncryptedKey>
    </KeyInfo>
    <CipherData>
      <CipherValue>mNPx+85tLgwnWk5C56jJS+MEE+CVhoB9dBFEDj5f4USIlI2vYwPTcicONNysFCpMc7jYjKvPl3k9Do9qqHdJCMR8h42QQ3W0OCsDPGRgbNDfh7afCcRzv/Oc6KYJnuTm1nMybs5HdntMHhKky7U5gvqpF8z9JbPAe4wHmvKzy4ORV67HW2m0HYZXRE4RG24IOcnsoKTu2HVy592QVSUa7/TCWZZ1qbmebEqzNR2cxYqIrAY4ZqEfrANZb+da756Pzonf/87QdP3q+LHzqcXDe3YYBm/3dv+Sh7IjJGTJPyrMQkDNHyVNW2R7UMECZgmaMUoT3WQMJgZWJQUZQcKRR0gDFSE0MHLyhNktUyk1jjw=</CipherValue>
    </CipherData>
  </EncryptedData>
</connectionStrings>
The last thing we need to do is to add the certificate we used for encryption to our cloud service in Azure portal, so that it could be decrypted and used on Azure.


That’s it. From now on you can use the web service with encrypted web.config file on Azure. 🙂
Thank you for reading and hope to see you in my other articles.

whoa! too fast! thanks 😀
Quick question: where do I put the “configProtectedData” section that will allow me to add the “thumbprint” attribute to my Key/Value pair? My web site was initially developed as a web site project, as opposed to a Cloud project. Does that make a difference in the set of attributes available in the web.config file?
You can put “configProtectedData” anywhere within the file, under the “Configuration” tag. For example, I put it right in the beginning, like this:
<?xml version="1.0"?>
<configuration>
  <configProtectedData>
    <providers>
      <add name="CustomProvider" thumbprint="AD035E7B861862552512D1E98E51CD86BCE3F946"
           type="Pkcs12ProtectedConfigurationProvider.Pkcs12ProtectedConfigurationProvider, PKCS12ProtectedConfigurationProvider, Version=1.0.0.0, PublicKeyToken=34da007ac91f901d"/>
    </providers>
  </configProtectedData>
<connectionStrings>
  <add name="DatabaseConnectionString" connectionString="Data Source=blablabla.database.windows.net;Initial Catalog=BlaBlaDB;User ID=yourusername;Password=yourpassword"
    providerName="System.Data.SqlClient" />
</connectionStrings>
<!-- other stuff -->
</configuration>
As for your second question, I haven’t worked on a web site project so I don’t really know for sure, but I don’t think there should be a difference (at least, for the “configProtectedData” part). The best way to find this out is to try if it works. 🙂
Finally, assuming you are going to host the web site on Azure, don’t forget to add the certificate in Azure portal. For websites, there isn’t a separate “Certificates” tab in the portal; you can upload the certificate from within the “Configure” tab. 🙂
Thanks for the follow up. My problem seems to be that I cant add the “thumbprint” attribute to the add element. I was wondering if it was a version thing, or a project type thing…
R
If by “I can’t add the thumbprint attribute” you mean Visual Studio gives a warning that says “The ‘thumbprint’ attribute is not allowed”, then you can ignore it because it does not create a problem (I get those warnings too, it’s normal). aspnet_regiis tool recognizes that tag and everything works as intented when you compile and deploy your project.
Actually, Visual Studio gives even more warnings after the encryption, because it does not recognize the encrypted value. Take a look at the screenshot below:
This is from the project that I used for demonstration in the article, and it works. 🙂
Great!
I’m getting this parse error
Configuration Error
Description: An error occurred during the processing of a configuration file required to service this request. Please review the specific error details below and modify your configuration file appropriately.
Parser Error Message: Failed to decrypt using provider ‘CustomProvider’. Error message from the provider: Value cannot be null.
Parameter name: keyObject
Source Error:
Line 112:
Line 113:
Line 114:
Line 115:
Line 116:
i am getting Error Message: Failed to decrypt using provider ‘CustomProvider,No certificate was found for thumbprint can u pls help me
Hey really nice article..but I have one quick question… what is the process to decrypt this encrypted file at our end
Nice article, quick question though. Am I able to use this same process if I am NOT using Azure Web Roles? I am not using an Azure Cloud Service project in my solution, I am simply using Azure Websites. Thanks in advance.
I may have found my answer here.
http://stackoverflow.com/questions/17189441/web-config-encryption-for-web-sites
hi i cant find certificate.can u pls help me
You have to install the PKCS provider into the GAC, per this MSDN article. https://msdn.microsoft.com/en-us/library/33ws57y0.aspx
So, just do “gacutil -i PKCS12ProtectedConfigurationProvider.dll” (from the bin folder) before running aspnet_regiis command.
Awesome. Worked perfect for Me. Note that the Pkcs12ProtectedConfigurationProvider is available as a NuGet package. Made life easy.
How can i do this with azure web apps ?
Hello, I tried on RSA and DPAPI much time but found your blog fortunately. I’ve followed your solution successfully(encrypted successfully with aspnet regiis). However, when after I deployed my WCF to Azure Cloud Service and run it, error showed ‘couldn’t load assembly PKCS12ProtectedConfigurationProvider’ and I adopted some solution for this by adding RegisterGAC.cmd and gacutil.exe to my WCF project but after this addition, even I couldn’t access to the Azure Cloud Service webpage.
Can we also use your solution in case of WCF (Windows Communication Foundation) which will be deployed to Azure Cloud Service? And How can we overcome an error like ‘couldn’t load assembly PKCS12ProtectedConfigurationProvider’ ?
Your solution approached to me as bright light and hope but I’ve lost again….
Any of your little advice will be highly appreciated ! 🙂
How can i do this with azure web apps ?