
If you wish to develop games for Windows 8, you’ll need to learn how to use Direct3D, HTML5 or a game engine that supports Windows 8 (like Unity or Construct2). Since XNA is not supported in Windows Store apps (and also since Microsoft has announced XNA will be discontinued), if you were using only XNA (like me) and you didn’t have enough time to learn the technologies I’ve listed, you may end up wondering how to create a game without you requiring to learn something entirely new.
If that is the case, you’ve found your easy solution. As long as the game is simple (don’t expect to put a physics engine or 3d models in there), we can use XAML’s features (like animations) and add the game logic to the codebehind files for a simple game.

It may not be something like Angry Birds, but I bet we could make something enjoyable.
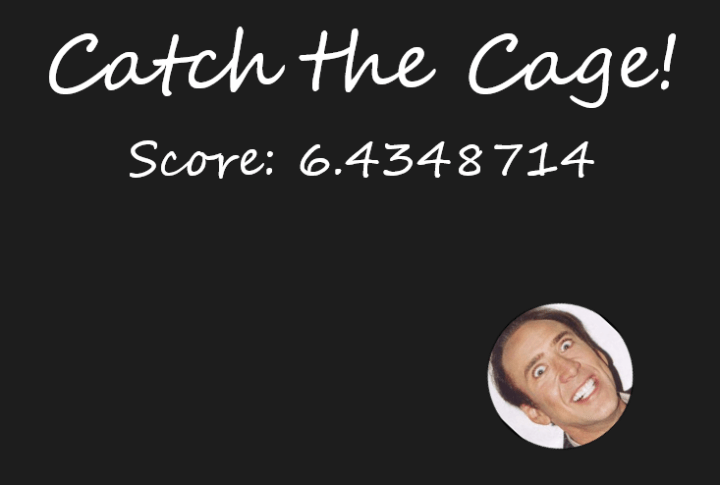
In this article, we’ll make an example game called… Catch the Cage!, starring Nicolas Cage. 😛 It will be a classic game where you tap the ball on the screen to keep it from falling out of the screen. Here’s a screenshot to whet your appetite. 🙂
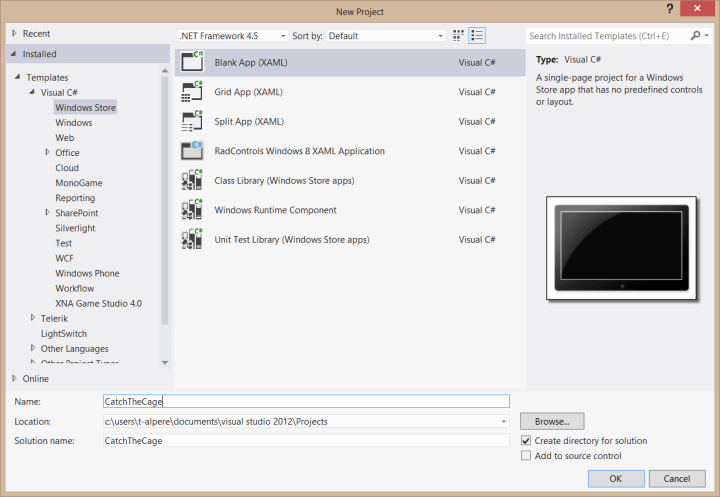
We’ll start our masterpiece game by creating a blank Windows Store app project in Visual Studio.
Now… Download the following image, and add it to the project in Visual Studio.

In MainPage.xaml, we’ll have the following items (I’ll explain them):
    <Grid x:Name="GridMain" Background="{StaticResource ApplicationPageBackgroundThemeBrush}">
        <Button x:Name="ButtonStart" Content="Start Game" Click="ButtonStart_Click" HorizontalAlignment="Center"/>
        <TextBlock FontFamily="Segoe Script" FontSize="80" Text="Catch the Cage!" HorizontalAlignment="Center" VerticalAlignment="Top" Margin="0,50,0,0"/>
        <TextBlock x:Name="TextBlockScore" FontFamily="Segoe Script" FontSize="50" HorizontalAlignment="Center" VerticalAlignment="Top" Margin="0,170,0,0"/>
        <Canvas x:Name="CanvasMain">
            <Ellipse x:Name="Ball" HorizontalAlignment="Left" Height="150" Margin="0" Stroke="Black" VerticalAlignment="Top" Width="150" PointerPressed="Ball_PointerPressed" RenderTransformOrigin="0.5,0.5" Visibility="Collapsed">
                <Ellipse.RenderTransform>
                    <RotateTransform x:Name="RotateTransformBall" Angle="1"/>
                </Ellipse.RenderTransform>
                <Ellipse.Fill>
                    <ImageBrush ImageSource="niccage.jpg" Stretch="UniformToFill"/>
                </Ellipse.Fill>
            </Ellipse>
        </Canvas>
    </Grid>
The Ellipse object here will be our ball. We’ve put it in a Canvas because Canvas control allows us to place objects in it based on the distance to its upper left corner. This way, we can reach our ball as if it was in a coordinate system (with X and Y values). You’ll also see that we’ve put a PointerPressed event in our Ellipse; this will be used when we touch the ball. We don’t use the Tapped event here, because Tap is a gesture (whereas PointerPressed is like a Click event) and it doesn’t fire most of the time when the ball is moving.
Next, we will add the main part of the game: The logic. Before adding it, however, I’ll explain how we’ll do it. Normally, if you developed games using XNA or other similar frameworks, you’ll know that they work in a loop. We have to make something similar here, so we’ll create a timer with a very low interval (like 5 – 10 ms) and that timer’s Tick event will be our game’s Update function.
Step by step, we’ll first add the necessary variables: The ball’s coordinates, vertical and horizontal speeds and rotation speed, the value of gravity, our random number generator (for rotation), starting time to keep the score and our timer.
        double ballX;
        double ballY;

        double verticalSpeed;
        double horizontalSpeed;
        double gravity;

        double screenWidth;
        double screenHeight;

        double rotationSpeed;

        Random random;

        DateTime startTime;

        DispatcherTimer gameTimer = new DispatcherTimer();
Next, we will initialize our variables in MainPage_Loaded:
        void MainPage_Loaded(object sender, RoutedEventArgs e)
        {
            ballX = (Window.Current.Bounds.Width - Ball.Width) / 2;
            Ball.SetValue(Canvas.LeftProperty, ballX);

            ballY = (Window.Current.Bounds.Height - Ball.Height) / 2;
            Ball.SetValue(Canvas.TopProperty, ballY);

            verticalSpeed = 0;
            horizontalSpeed = 0;
            gravity = 2;

            random = new Random();

            gameTimer.Interval = new TimeSpan(0, 0, 0, 0, 5);
            gameTimer.Tick += gameTimer_Tick;
        }
Here, we just put the ball to the center of the screen and initialize other variables. Next, we’ll fill gameTimer_Tick function:
using Windows.UI.Popups;
void gameTimer_Tick(object sender, object e)
{
if (verticalSpeed <= 70 && verticalSpeed >= -70)
{
verticalSpeed += gravity;
}
ballX += horizontalSpeed;
ballY += verticalSpeed;
if (ballY >= Window.Current.Bounds.Height - Ball.Height)
{
//The ball has touched the ground
gameTimer.Stop();
MessageDialog messageDialog = new MessageDialog("Cage has fallen. :(");
messageDialog.ShowAsync();
}
if (ballX >= Window.Current.Bounds.Width - Ball.Width || ballX <= 0)
{
horizontalSpeed *= -1;
}
RotateTransformBall.Angle += rotationSpeed;
TextBlockScore.Text = "Score: " + (DateTime.Now - startTime).TotalSeconds.ToString();
Ball.SetValue(Canvas.LeftProperty, ballX);
Ball.SetValue(Canvas.TopProperty, ballY);
}
Here, we update the score and the speed of the ball, set the ball’s new position and check if it has hit the side edges or the bottom of the screen. If the ball hits the sides, it will change direction, and if it hits the bottom the game will be over.
The final thing we need to add is the Ball_PointerPressed function to handle the user touching the ball (and of course, the Click event of our start button to start the timer):
        private void ButtonStart_Click(object sender, RoutedEventArgs e)
        {
            ButtonStart.Visibility = Visibility.Collapsed;
            verticalSpeed = -30;
            Ball.Visibility = Visibility.Visible;
            startTime = DateTime.Now;
            gameTimer.Start();
        }

        private void Ball_PointerPressed(object sender, PointerRoutedEventArgs e)
        {
            verticalSpeed = -30;
            horizontalSpeed = -1 * (e.GetCurrentPoint(Ball).Position.X - 75) / 1.5;
            rotationSpeed = random.Next(-10, 10);
        }
In Ball_PointerPressed, we throw the ball up, determine a random rotation speed, and also change the ball’s horizontal speed depending on the place it was touched (if you touched its left side, it goes right and vice versa).
The game is complete. Now run it and laugh as you try to keep Nicolas Cage from falling. 😀

Bonus points if you put Benny Hill theme as background music. 😀
Now, I have an extremely strong feeling that this is nowhere near a good practice and I believe it would have a really poor performance if things were to get complicated; but as I’ve said, for simple games it could be suitable. I bet I could create a side-scroller kind of game like this.
Anyway, here‘s the source code if you wish to experience this awesome game yourself.
Thank you for reading and see you in my next articles.
