
Hi everyone,
In Windows Store applications, GridView control provides us a visually attractive, flexible and customizable way of presenting our data to the users. Although we can edit the ItemTemplate to show each item the way we want, there may be situations where we need to use more advanced features of the GridView. One of these situations is when we wish to group our data (dynamically), and put headers on top of the groups. Here’s an example, grouped by their month and year:

As you can see, this functionality can come in handy in many situations. However, before going on to explain how we can do this, there is another issue we should think of. What if we have a lot of items in our GridView, or the user wishes to look at an item at last group (in the previous example, the earliest date)? In that case, the user would need to do a good amount of scrolling, and that reduces the usability for our application. To prevent this in our Windows Store apps, we can use semantic zoom.

Semantic zoom allows the user to see the categories of the items with a pinch move (or with ctrl + mousewheel), and then select them to go directly to that group. In the example, you can see that items are grouped by their month and years. We can add semantic zoom to our grouped gridview so the users can select and go directly to their desired group.
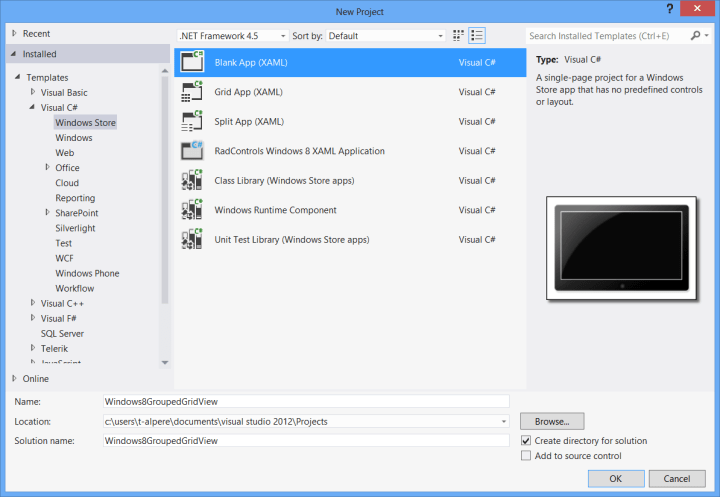
Alright then, time to start building our application. 🙂 Let’s fire up Visual Studio 2012, and open a new Windows Store Blank App project. I named this project Windows8GroupedGridView.
We’ll start by adding the SemanticZoom control in MainPage.xaml. Either drag from toolbox, or copy & paste the following code to add the semantic zoom control.
        <SemanticZoom Margin="120,100,0,100">
            <SemanticZoom.ZoomedInView>
                <GridView ScrollViewer.IsHorizontalScrollChainingEnabled="False" ScrollViewer.IsVerticalScrollChainingEnabled="False"/>
            </SemanticZoom.ZoomedInView>
            <SemanticZoom.ZoomedOutView>
                <GridView Name="ZoomedOutGridView" ScrollViewer.IsHorizontalScrollChainingEnabled="False" ScrollViewer.IsVerticalScrollChainingEnabled="False"/>
            </SemanticZoom.ZoomedOutView>
        </SemanticZoom>
As you can see, SemanticZoom control has two sections: ZoomedInView and ZoomedOutView, with each of them having a GridView in it. As you can understand from their names, the GridView in the ZoomedInView section will be our grouped gridview, and the GridView in the ZoomedOutView will be the gridview which allows the user to select a group.
We will start with preparing the necessary classes and resources. First, we should decide what we want to show to the users. In this example, we can show them a list of cars, grouped by their brands. So, we should create a Car class in our MainPage.xaml.cs file like this:
    public class Car
    {
        public string Brand { get; set; }
        public string Model { get; set; }
        public string Year { get; set; }
        public string Color { get; set; }
    }
To use headers in our GridView, we’ll also need to make another class that provides the GridView the name of the Category (what we will show in the header) and the list of the cars in that category:
    public class CarCategory
    {
        public string CategoryName { get; set; }
        public List<Car> Cars { get; set; }
    }
Lastly, we will need a CollectionViewSource, to bind our data to the GridView:
    <Page.Resources>
        <CollectionViewSource
            x:Name="groupItemsViewSource"
            IsSourceGrouped="true"
            ItemsPath="Cars"/>
    </Page.Resources>
Now we can move on to our GridViews. The GridView in our ZoomedInView should have the following ItemTemplate,
            <SemanticZoom.ZoomedInView>
                <GridView ScrollViewer.IsHorizontalScrollChainingEnabled="False" ScrollViewer.IsVerticalScrollChainingEnabled="False" ItemsSource="{Binding Source={StaticResource groupItemsViewSource}}">
                    <GridView.ItemTemplate>
                        <DataTemplate>
                            <Grid Width="300" Height="100" Background="CadetBlue">
                                <TextBlock Margin="10,10,10,0" Text="{Binding Model}" VerticalAlignment="Top" FontSize="15"/>
                                <TextBlock Margin="10,40,10,0" Text="{Binding Year}" VerticalAlignment="Top" FontSize="15"/>
                                <TextBlock Margin="10,70,10,0" Text="{Binding Color}" VerticalAlignment="Top" FontSize="15"/>
                            </Grid>
                        </DataTemplate>
                    </GridView.ItemTemplate>
                    <GridView.GroupStyle>
                        <GroupStyle>
                            <GroupStyle.ContainerStyle>
                                <Style TargetType="GroupItem">
                                    <Setter Property="Template">
                                        <Setter.Value>
                                            <ControlTemplate TargetType="GroupItem">
                                                <Border BorderBrush="{TemplateBinding BorderBrush}" BorderThickness="{TemplateBinding BorderThickness}" Background="{TemplateBinding Background}">
                                                    <Grid Margin="0,0,50,0">
                                                        <Grid.RowDefinitions>
                                                            <RowDefinition Height="Auto"/>
                                                            <RowDefinition Height="*"/>
                                                        </Grid.RowDefinitions>
                                                        <ContentPresenter ContentTemplate="{TemplateBinding ContentTemplate}" Content="{TemplateBinding Content}" Margin="{TemplateBinding Padding}"/>
                                                        <ItemsControl x:Name="ItemsControl" ItemsSource="{Binding GroupItems}" Grid.Row="1"/>
                                                    </Grid>
                                                </Border>
                                            </ControlTemplate>
                                        </Setter.Value>
                                    </Setter>
                                </Style>
                            </GroupStyle.ContainerStyle>
                            <GroupStyle.HeaderTemplate>
                                <DataTemplate>
                                    <TextBlock FontSize="20" Text="{Binding CategoryName}" Foreground="White" Margin="15,0,0,0"/>
                                </DataTemplate>
                            </GroupStyle.HeaderTemplate>
                            <GroupStyle.Panel>
                                <ItemsPanelTemplate>
                                    <VariableSizedWrapGrid Orientation="Vertical"/>
                                </ItemsPanelTemplate>
                            </GroupStyle.Panel>
                        </GroupStyle>
                    </GridView.GroupStyle>
                </GridView>
            </SemanticZoom.ZoomedInView>
The GridView.ItemTemplate part is how our individual items will be shown, and the GroupStyle.HeaderTemplate (in GridView.GroupStyle) is how our headers will be shown. We also set the ItemsSource to our previously defined CollectionViewSource.
We will finally need to prepare our GridView in ZoomedOutView:
            <SemanticZoom.ZoomedOutView>
                <GridView Name="ZoomedOutGridView" ScrollViewer.IsHorizontalScrollChainingEnabled="False" ScrollViewer.IsVerticalScrollChainingEnabled="False">
                    <GridView.ItemTemplate>
                        <DataTemplate>
                            <Grid Height="150" Width="200" Background="CadetBlue">
                                <TextBlock Margin="0" TextWrapping="Wrap" Text="{Binding CategoryName}" FontSize="20" VerticalAlignment="Center"/>
                            </Grid>
                        </DataTemplate>
                    </GridView.ItemTemplate>
                </GridView>
            </SemanticZoom.ZoomedOutView>
And now our GridViews are complete. We just need to create a list of Car objects, and group them by their brands in a list of CarCategory objects:
        List<Car> carList;
        List<CarCategory> carCategoryList;

        public MainPage()
        {
            this.InitializeComponent();
            loadCars();
            groupCars();
        }

        private void loadCars()
        {
            carList = new List<Car>();
            carList.Add(new Car() { Brand = "Audi", Model = "A1", Color = "Blue", Year = "2010" });
            carList.Add(new Car() { Brand = "Audi", Model = "A3", Color = "Black", Year = "1996" });
            carList.Add(new Car() { Brand = "Audi", Model = "A4", Color = "White", Year = "1993" });
            carList.Add(new Car() { Brand = "Audi", Model = "A5", Color = "Gray", Year = "2007" });
            carList.Add(new Car() { Brand = "Audi", Model = "TT", Color = "Gray", Year = "1998" });
            carList.Add(new Car() { Brand = "Audi", Model = "Q3", Color = "Brown", Year = "2012" });
            carList.Add(new Car() { Brand = "Audi", Model = "Q7", Color = "Blue", Year = "2007" });
            carList.Add(new Car() { Brand = "Ferrari", Model = "California", Color = "Blue", Year = "2008" });
            carList.Add(new Car() { Brand = "Ferrari", Model = "458 Italia", Color = "Red", Year = "2010" });
            carList.Add(new Car() { Brand = "Ferrari", Model = "F12berlinetta", Color = "Red", Year = "2012" });
            carList.Add(new Car() { Brand = "Ferrari", Model = "FF", Color = "Silver", Year = "2011" });
            carList.Add(new Car() { Brand = "Lamborghini", Model = "Aventador", Color = "White", Year = "2011" });
            carList.Add(new Car() { Brand = "Lamborghini", Model = "Diablo", Color = "Orange", Year = "1990" });
            carList.Add(new Car() { Brand = "Lamborghini", Model = "350 GT", Color = "Gray", Year = "1964" });
            carList.Add(new Car() { Brand = "Lamborghini", Model = "Gallardo", Color = "Yellow", Year = "2004" });
            carList.Add(new Car() { Brand = "Lamborghini", Model = "Reventon", Color = "Silver", Year = "2008" });
            carList.Add(new Car() { Brand = "Porsche", Model = "911", Color = "Black", Year = "1963" });
            carList.Add(new Car() { Brand = "Porsche", Model = "918 Spyder", Color = "Silver", Year = "2010" });
            carList.Add(new Car() { Brand = "Porsche", Model = "944", Color = "Black", Year = "1982" });
            carList.Add(new Car() { Brand = "Porsche", Model = "Boxter", Color = "Black", Year = "1996" });
            carList.Add(new Car() { Brand = "Porsche", Model = "Cayman", Color = "White", Year = "2005" });
            carList.Add(new Car() { Brand = "Porsche", Model = "Cayenne", Color = "White", Year = "2004" });
        }

        private void groupCars()
        {
            carCategoryList = new List<CarCategory>();
            var carGroups = carList.OrderBy(e => e.Brand).GroupBy(e => e.Brand);
            foreach (System.Linq.IGrouping<string, Car> item in carGroups)
            {
                carCategoryList.Add(new CarCategory() { CategoryName = item.Key, Cars = item.ToList<Car>() });
            }
            groupItemsViewSource.Source = carCategoryList;
            ZoomedOutGridView.ItemsSource = carCategoryList;
        }
Finally, we will need to set the ViewChangeStarted event of our SemanticZoom control to go to a group when the user selects it:
        private void SemanticZoom_ViewChangeStarted(object sender, SemanticZoomViewChangedEventArgs e)
        {
            if (e.SourceItem.Item == null) return;

            e.DestinationItem = new SemanticZoomLocation { Item = e.SourceItem.Item };
        }
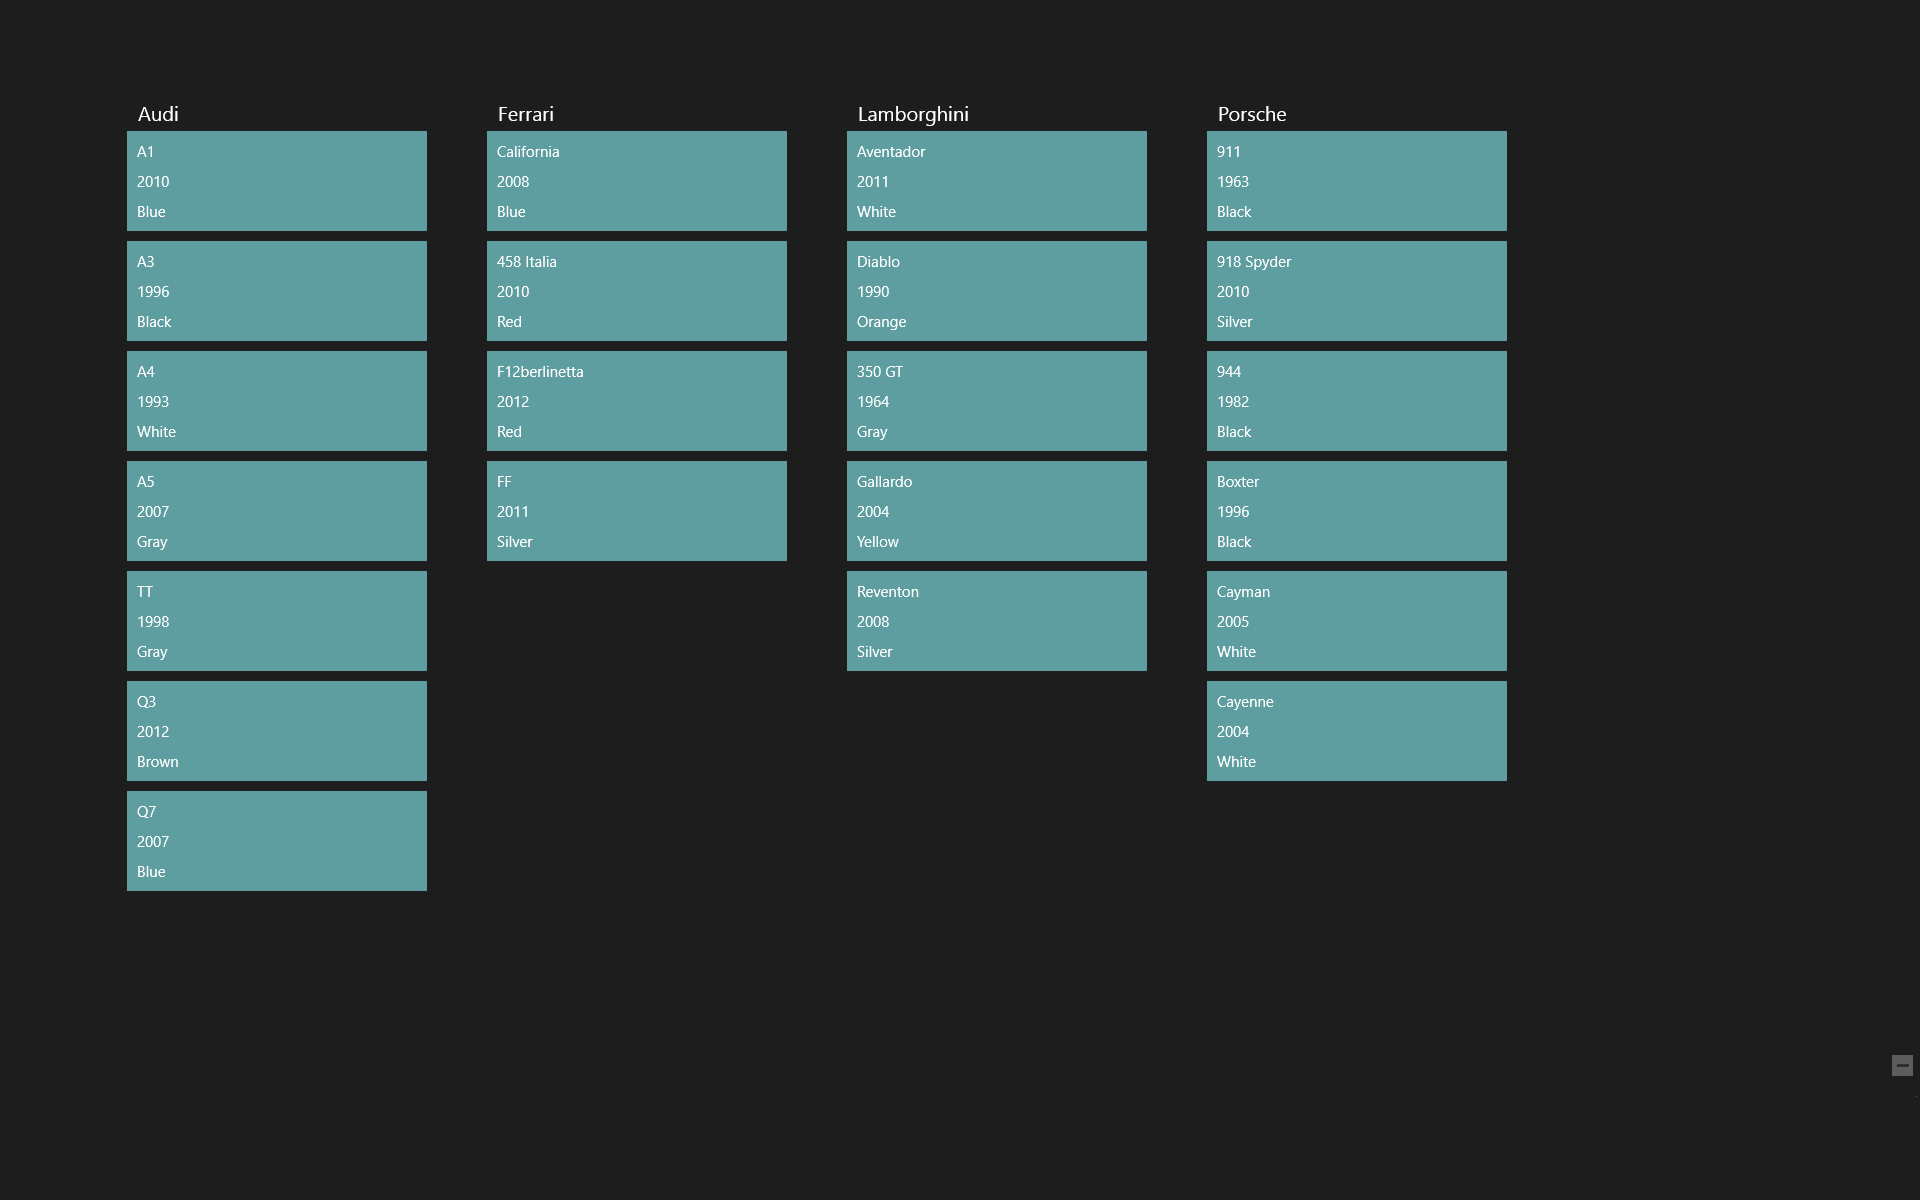
Our application is finally completed. If you run it, you will see the following screens.
Zoomed in:
Zoomed out:

You can work on the item templates to make them look better. 🙂
You can download the source code of the application here.

Nice Article…
Thank you. 🙂
Thanks, nice work.
i want to zoom out when i click on any of the headers.
On header click event,
just write semanticzoom.ToggleActiveView() to zoom out
Would you be able to make your source code available again?? Many thanks, Kind regards, Glenn
Thanks for the heads up; I’ve updated the link in the post. Here it is: https://onedrive.live.com/redir?resid=AE2C0BB6210C38C5!458&authkey=!AFPhcFjpG4-DUMo&ithint=file%2czip
Dear Alp, many thanks for the link. I just wanted to say that your tutorial is one of the very few that I was able to understand and get to work – thank you.
Hi everyone, grateful for any help that can be given.
I’m trying to build a click/tap event handler to navigate to a different page after selecting an item from the ZoomedIn view.
I’ve amended Alp’s code to:
<!--TextBlock Text="{Binding Year}" FontSize="20" FontFamily="segoe wp"/>-->and what I want to do is to click on say “A1” and I was hoping it would take me to a different page by using the below event handler……
private void ZoomedInTextBlock_Tapped(object sender, TappedRoutedEventArgs e)
{
if (carList.ToString() == “A1”)
{
Frame.Navigate(typeof(Page1));
}
}
Unfortunately this doesn’t work!
I guess i’m not understanding the process correctly – grateful for any tips!
Glenn