
Any person that has a basic computer knowledge can go ahead and use Microsoft Network Monitor, Fiddler or any other similar application to monitor his/her own network traffic, whereupon he/she will see that the applications which use HTTP have their data displayed plainly. And people with a little more technical knowledge can go further and use other applications (such as Cain and Abel) to sniff the whole network, which will include packages from every computer connected to it. So, someone just logged in to a website that used HTTP while you were listening to the network? Well, tough luck for him/her, because you’ve just sniffed the username and password.
For demonstration, I’ve created an Azure Cloud Service that has a method which returns the number of characters for a given string. And as you see, Fiddler directly catches my request to the web method and its response:

This is what I sent to the web method.

And this is what the web method returned.
Of course, a competent developer would take precautions against this. We use hashing and salting for username – passwords so they are not displayed plainly, but still, we don’t want people to get the hashed version either, because then they could try decrypting it or use that hashed version to make calls to our service themselves. Therefore, we need more security.
This is where HTTPS comes in, which is actually the HTTP protocol with SSL on top. SSL (Secure Socket Layer) uses certificates for encryption and authorization, therefore allowing a secure communication over the network. Many applications (such as e-mail, instant messaging or voice-over-IP applications) use this to ensure security, and in this article, we’ll see how we can use it in our own Azure Cloud Service.
Now, as I’ve said, we need a digital certificate to use SSL. They are provided by trusted third party companies called Certificate Authorities (CA for short), so we need to get a valid certificate from such a company. This is usually done for a price, but I’ve read on the internet that there are some CA’s that provide a certificate for free. However, we can also create a self-signed certificate to use while developing and debugging our app, which is exactly what we will be doing in this article.
Well then, let’s create it. We’ll start by opening Developer Command Prompt for VS2012 as administrator.

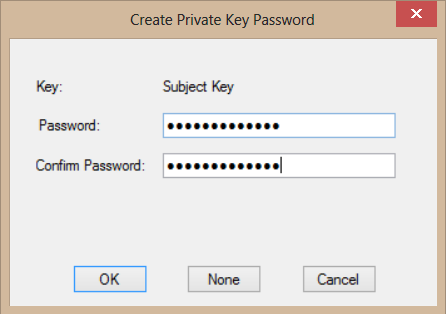
We’ll use “makecert.exe” to create the certificate. In command prompt, run the command below to create it. It will ask for a password (twice); enter a password you wish (we’ll use it later).
makecert -r -pe -n CN=alpSSLTestCert -sky signature alpSSLTestCert.cer -sv alpSSLTestCert.pvk

If you get an error in this step, it may be because of the name you give to the certificate.
Next, we’ll create a .pfx file, which is how certificates are stored (opening a pfx file requires the password we used at the previous step). So, to create it, we’ll use “pvk2pfx.exe” tool:
pvk2pfx -pvk alpSSLTestCert.pvk -spc alpSSLTestCert.cer -pfx alpSSLTestCert.pfx -pi the-password-you-used

Alright then, we’ve created our self-signed certificate. Open C:\Windows\SysWOW64 (if you’re using 64-bit Windows 8) or C:\Windows\System32 (if you’re using 32-bit Windows 8) and you’ll see the files.

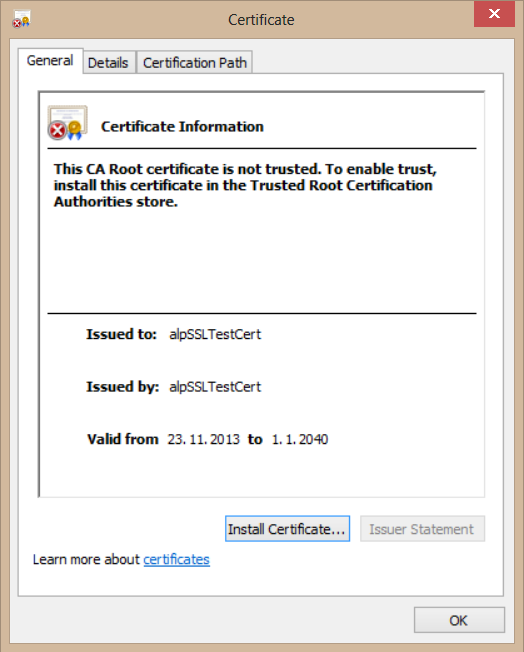
Now, we’ll install the certificate we’ve created to the local machine’s personal certificate store, by double-clicking the .cer file, selecting Install Certificate, selecting Local Machine and then selecting Personal store.


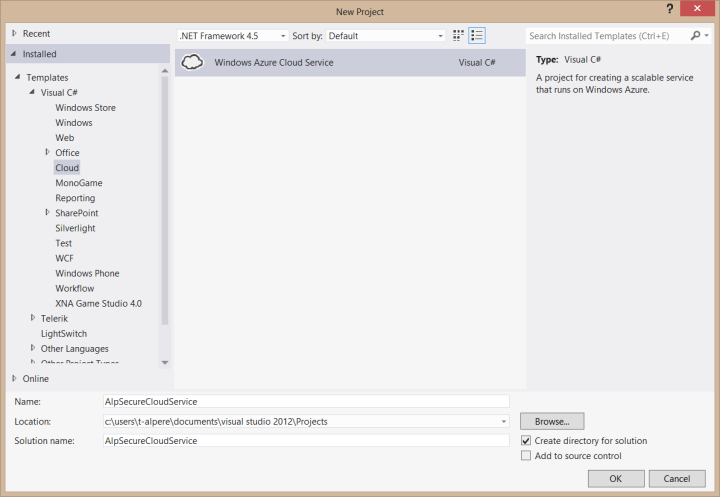
Our next step is creating the web service. Open Visual Studio, create a new Windows Azure Cloud Service project, and select WCF Web Role.

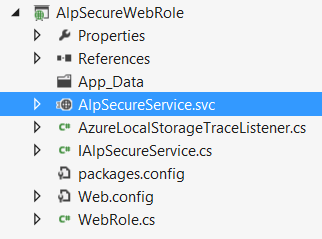
Next, rename the Service1 class and IService1 interface by right-clicking on them and selecting Refactor->Rename. Also rename the Service1.svc and IService1.cs to give them a more meaningful name (I’ve named the class, the interface and the files to AlpSecureService and IAlpSecureService). Then, fill them with a test method that receives a string and returns the number of characters in that string.

In AlpSecureService.svc:
    public class AlpSecureService : IAlpSecureService
    {
        public string testMethod(string input)
        {
            return input.Length + " characters";
        }
    }
In IAlpSecureService.cs:
    [ServiceContract]
    public interface IAlpSecureService
    {
        [OperationContract]
        string testMethod(string input);
    }
Our next step will be adding our certificate to the cloud service definition and configuration files. To do this, right-click the web role under the Roles folder of the cloud service project and select Properties.

Then, select Certificates from the list on the left and click Add Certificate. Give the certificate a name, select “Local Machine” for the store location, select “My” for the store name, and click “…” in the thumbprint part to select the certificate we’ve created from the list (which will fill the thumbprint value).


Next, we will configure our cloud service to use https protocol with certificate we’ve created. Click Endpoints from the list on the left; then set the protocol of the existing endpoint to https, set the public port to 443 and select the certificate. You can also give a meaningful name to the endpoint here.

The last thing we need to do in the cloud service project before we deploy it to Azure is to define the web service in the web role’s web.config file. Normally this is not required, but if we don’t define it when we have only an https endpoint, we get an annoying “Service has zero application (infrastructure) endpoints” error when deployed. We also need to set “httpsGetEnabled=true” if we want to be able to get the web service’s contents (you may want to set it to false after you’ve connected your client app to the web service, so other people can’t read your web methods).
<serviceMetadata httpsGetEnabled="true"/>
    <bindings>
      <basicHttpBinding>
        <binding name="">
          <security mode="Transport" />
        </binding>
      </basicHttpBinding>
    </bindings>
    <services>
      <service name="HttpsTestServiceRole.HttpsTestService">
        <endpoint binding="basicHttpBinding" contract="HttpsTestServiceRole.IHttpsTestService"/>
      </service>
    </services>
The full web.config file will be like the following:
<?xml version="1.0"?>
<configuration>
  <!--  To collect diagnostic traces, uncomment the section below or merge with existing system.diagnostics section.
        To persist the traces to storage, update the DiagnosticsConnectionString setting with your storage credentials.
        To avoid performance degradation, remember to disable tracing on production deployments.
  <system.diagnostics>
    <sharedListeners>
      <add name="AzureLocalStorage" type="HttpsTestServiceRole.AzureLocalStorageTraceListener, HttpsTestServiceRole"/>
    </sharedListeners>
    <sources>
      <source name="System.ServiceModel" switchValue="Verbose, ActivityTracing">
        <listeners>
          <add name="AzureLocalStorage"/>
        </listeners>
      </source>
      <source name="System.ServiceModel.MessageLogging" switchValue="Verbose">
        <listeners>
          <add name="AzureLocalStorage"/>
        </listeners>
      </source>
    </sources>
   </system.diagnostics> -->
  <system.diagnostics>
    <trace>
      <listeners>
        <add type="Microsoft.WindowsAzure.Diagnostics.DiagnosticMonitorTraceListener, Microsoft.WindowsAzure.Diagnostics, Version=1.8.0.0, Culture=neutral, PublicKeyToken=31bf3856ad364e35"
          name="AzureDiagnostics">
          <filter type="" />
        </add>
      </listeners>
    </trace>
  </system.diagnostics>
  <system.web>
    <compilation debug="true" targetFramework="4.0" />
    <customErrors mode="Off"/>
  </system.web>
  <system.serviceModel>
    <behaviors>
      <serviceBehaviors>
        <behavior>
          <!-- To avoid disclosing metadata information, set the value below to false before deployment -->
          <serviceMetadata httpsGetEnabled="true"/>
          <!-- To receive exception details in faults for debugging purposes, set the value below to true.  Set to false before deployment to avoid disclosing exception information -->
          <serviceDebug includeExceptionDetailInFaults="false"/>
        </behavior>
      </serviceBehaviors>
    </behaviors>
    <serviceHostingEnvironment multipleSiteBindingsEnabled="true" />
    <bindings>
      <basicHttpBinding>
        <binding name="">
          <security mode="Transport" />
        </binding>
      </basicHttpBinding>
    </bindings>
    <services>
      <service name="HttpsTestServiceRole.HttpsTestService">
        <endpoint binding="basicHttpBinding" contract="HttpsTestServiceRole.IHttpsTestService"/>
      </service>
    </services>
  </system.serviceModel>
  <system.webServer>
    <modules runAllManagedModulesForAllRequests="true"/>
    <!--
        To browse web app root directory during debugging, set the value below to true.
        Set to false before deployment to avoid disclosing web app folder information.
    -->
    <directoryBrowse enabled="true"/>
  </system.webServer>
</configuration>
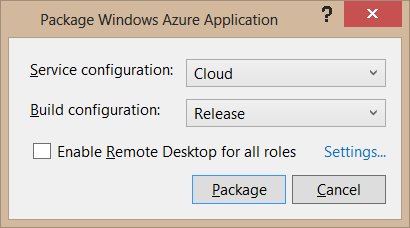
Our cloud service is ready to be deployed. Right-click the cloud service project and select Package to create the package we’ll deploy to Azure.

To deploy the cloud service to Azure, open Windows Azure Portal, select New->Cloud Service and click Custom Create.

Select a URL for the web service, select a region or affinity group, check “Deploy a cloud service package” and click next.

Then enter a deployment name, select the package and configuration files, check “Deploy even if one or more roles contain a single instance” and “Add certificates”, and click Next.

Now we will add the .pfx file we’ve created. Select the .pfx file and enter the password you’ve used when you created the certificate. Then click “Attach Certificate” and you’ll see it as attached on the right. Press next and wait for the files to be uploaded and deployed.


Let’s check if our service is working then. Click the site URL in the dashboard of your service, and replace http with https. If working properly, your browser will warn you that the certificate is not valid and ask you if you are really sure you want to open the URL. This is normal since we’re using a self-signed certificate. If the site opens, then well done; you’re now using HTTPS in your cloud service. 🙂


Before we go on to celebrate this accomplishment, however, there is one more thing we need to do. If we try to use this cloud service now, we’ll get a quite nice exception shown below:

Oh noes.
This is WCF’s way of saying “Go get a valid certificate.”. But we wanted to use it while developing our app, so we have to allow the invalid certificate. In desktop applications using .NET, it is possible to allow invalid certificates using the code below before creating the service client (or there are ways to check the certificate in the app ourselves to determine if it should be allowed):
ServicePointManager.ServerCertificateValidationCallback = new RemoteCertificateValidationCallback(
    delegate
    {
        return true;
    });
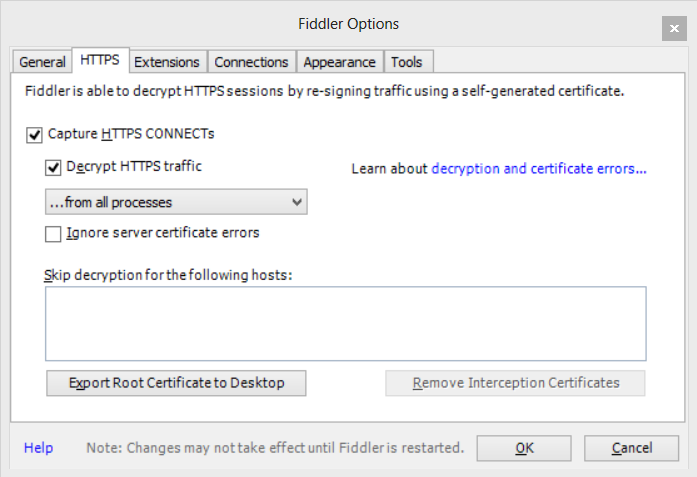
But, guess what: This isn’t supported in WinRT. To use our self-signed-certificate-using https cloud service while developing a Windows Store app, we have to do a little workaround using our old friend Fiddler. Open Fiddler, go to Tools->Fiddler Options->HTTPS and check “Capture HTTPS CONNECTs” and “Decrypt HTTPS traffic”.
Now, Fiddler reroutes the network packets to pass through itself, and when you make a call to the HTTPS web service from your WinRT app, Fiddler will detect that the certificate is not valid and ask you if you want to allow it. You can sey “Yes” to use the self-signed certificate this way until you get a valid one.

That’s it. 😉
One final note is that if you activate HTTPS decryption in Fiddler, then you’ll see that… well, it decrypts HTTPS. You may be thinking “But.. but, this was supposed to be secure?”. This is because we’re listening to our own device’s traffic, and letting Fiddler add its own certificate to our trusted publishers store, which is actually a breach of security that allows it to work. It is a little more complicated to decrypt the HTTPS packets belonging to others (but it is possible, so have a strong encryption in your app, too).
And with the end of this post, my 30-day long marathon called Boredom Challenge is complete. It has resulted in quite good articles where not only I learned tons of new stuff, but also I had the chance to share this knowledge. Maybe I’ll do a sequel when I’m bored again. 😀
Thank you very much for reading. 🙂

thx for this article you have saved my life
Glad I could help. 🙂
Nice one!
Btw, did you write anything about Windows Azure step by step? Maybe with Windows Store? Something like using the sql database.
I haven’t, but I could, because I have extensively worked on a Windows Store app which connected to an SQL database on Azure. I was planning to write an article this weekend, and looks like this will be my topic then. 🙂
Great 😀 It would be really helpful if you could start from the basic on Azure, like creating the account, then connecting with Windows Store etc. I ran through some trouble while doing them myself.
Great work. Thanks!
Your writing is witful and delightful ! totally but especially at quite nice exception, haha 🙂 Thank you for important knowledges.
Your writing is witful and delightful ! totally but especially at quite nice exception, haha:) Thank you for important knowledges. And I think you’d better feel bored always to write good articles.